


Complete Guide on Attack Surface Discovery
October 9, 2024
11 min read


Understanding and managing the attack surface is essential for maintaining strong security defenses. This guide offers a complete way to map your attack surface. It will help you find vulnerabilities, assess risks, and implement security measures. We will cover steps to inventory assets and track changes in the IT environment.
Basic Concepts
Before we start, we must understand the basics. We need to know what an attack surface is and what types of attack surfaces there are. We also need the tools and the data for external discovery.
What is Attack Surface Discovery?
Attack surface discovery is the first step in any penetration testing process. In this phase, cybersecurity experts will conduct reconnaissance. They will look for all the organization’s network resources accessible from the Internet.
- Attack surface
- the sum of all potential points (attack vectors) in a network that could be used by an unauthorized user (attacker) to gain access to or extract data from the network. It includes all hardware, software, and network components that are exposed.
- Attack surface discovery
- the process of identifying and mapping all potential points (attack vectors) within an organization’s network. Internal hardware, and software systems that could be exploited by unauthorized users (attackers).
Discovery of the attack surface is a constant security imperative. It helps organizations find and fix new vulnerabilities as they arise. It also ensures quick detection and assessment of changes in dynamic IT environments. This proactive approach helps mitigate potential threats before they escalate into attacks.
- Attack surface mapping
- involves creating a detailed representation or map of the identified attack surface. It goes a step further than discovery by documenting and visualizing an attack surface.
In this guide we will perform both discovery and mapping at the same time. Therefore, sometimes in the text these terms will be used as synonyms.
Types of Attack Surface
There are two types of attack surfaces: external and internal.
- External attack surface
- refers to all the potential points of entry that an attacker can exploit from outside an organization’s network. It covers all accessible systems, applications, and services.
- Internal attack surface
- all the vulnerabilities and points of entry within an organization’s internal network. This includes systems and apps that, though not on the internet, still can be exploited by insiders or through compromised access.
This guide focuses on finding the external attack surface.
Data to Discover an External Attack Surface
In mapping the attack surface, you must find many relationships between network entities. Domain names, IP ranges, and autonomous systems are just part of the scope. To find these relationships, we will use various data sources. The primary ones are:
- WHOIS: A network protocol and a database. It has information on the owners of IP addresses and domain names. It provides data like the registrant’s name, contact details, and registration dates.
- DNS: Databases that store mappings for forward and reverse DNS lookups. In forward DNS lookups, the system converts domain names into IP addresses. Conversely, reverse DNS lookups turn IP addresses back into domain names.
- SSL Certificates: A valuable source of company domain names. They also help find connections between entities, like company names and organization units. Also provide contact information.
Tools to Discover an External Attack Surface
To discover an external attack surface, you need specialized tools. They must address different aspects of the process:
- Data Access Tools: Tools that provide access to data for mapping an attack surface. This includes databases like WHOIS, DNS, and SSL certificates.
- Visualization Tools: Graphical tools to visualize an attack surface. It helps to understand and communicate potential risks. Examples include Maltego, Microsoft Visio, and Netlas Discovery Tool.
- Subdomain Enumeration Tools: Specifically designed to uncover subdomains associated with the target domain. Examples include Sublist3r, Amass, and Assetfinder.
- Network Scanners: Tools like Nmap and Masscan are used to identify active devices and exposed ports on your external network.
- Web Application Scanners: Tools such as OWASP ZAP and Burp Suite to find security issues in web applications.
This guide will use the tools mentioned, plus Netlas.io. We believe it is the best tool for attack surface management. It has all the tools needed to streamline the process.
Recommended Reading
Best Attack Surface Visualization Tools

In this guide we will use:
- Netlas Attack Surface Discovery Tool
- An intuitive tool designed for building and visualizing attack surfaces. With a few clicks, users can add or remove objects and instantly see all the connections between them. It has a graphical interface that is intuitive and helps to clarify the attack surface.
- Netlas Search Tools
- A comprehensive suite of tools offered by Netlas. They let users search billions of DNS records and certificates. They can investigate any IP address in the WHOIS database. They can also retrieve responses for hundreds of millions of hosts.
Discovering an Attack Surface
Before we can scan the surface for vulnerabilities, we must first find it. Here are the general steps of the attack surface mapping process:
- Search for Root Domains
Use WHOIS lookups to find the target organization’s main domains. - Search for Root IPs
Use IP WHOIS lookups to identify the main IP addresses connected to these domains. - Subdomain Enumeration
Uncover all possible subdomains associated with the root domains. - Forward and Reverse DNS Lookups
Translate domain names to IP addresses and vice versa. It helps us understand the network structure. - Vertical Expansion
Identify extra layers of infrastructure, services, and assets related to the discovered entities. - Result Analysis
Filter your findings to exclude entities that do not constitute the attack surface. - Further Research
Try to find resources that are not directly linked to the attack surface.
Let’s show the whole process using the Netlas Discovery Tool. At the same time we’ll introduce alternative methods. This approach allows you to select the method that best fits your needs.
Step 1: Root Domains
The first step is to gather basic objects. We will then expand our search area in depth and breadth. The best way is to search using the name of the company you want to investigate.
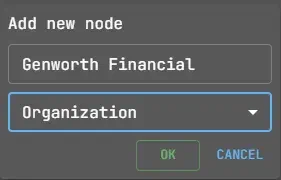
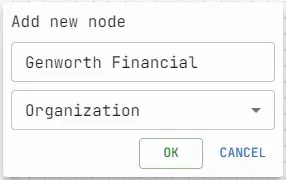
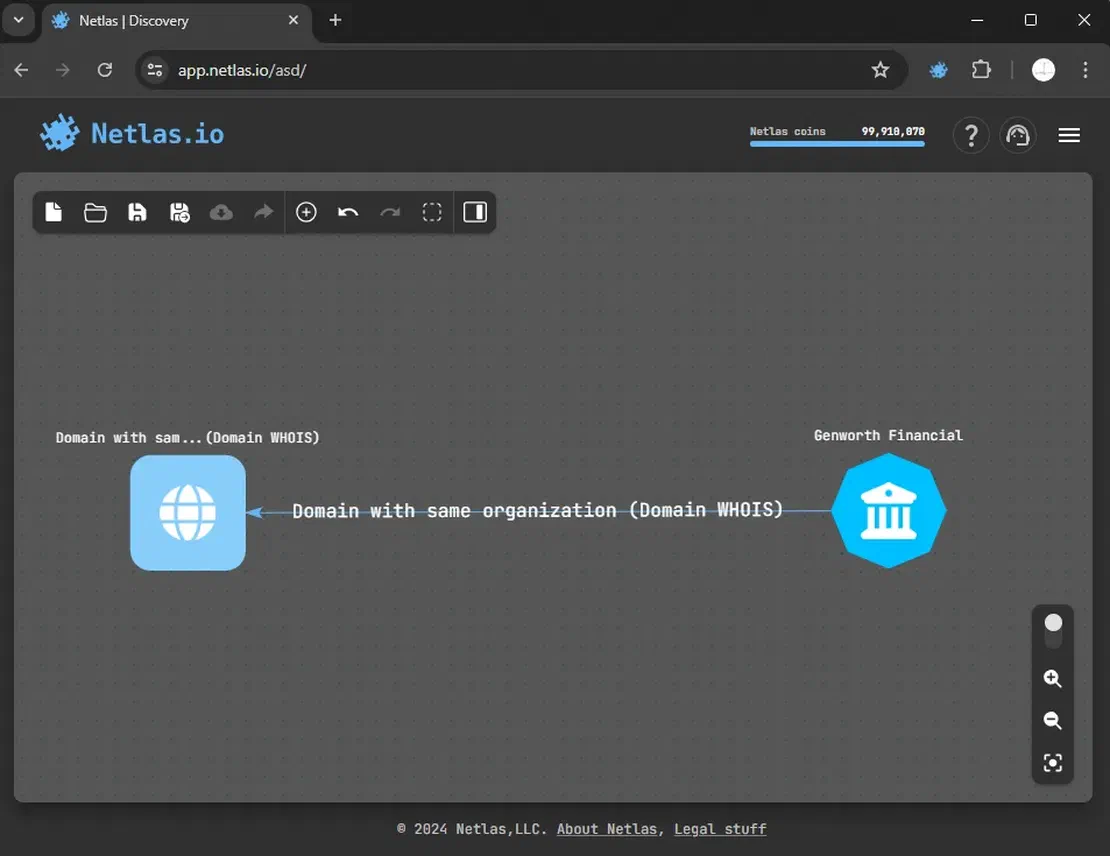
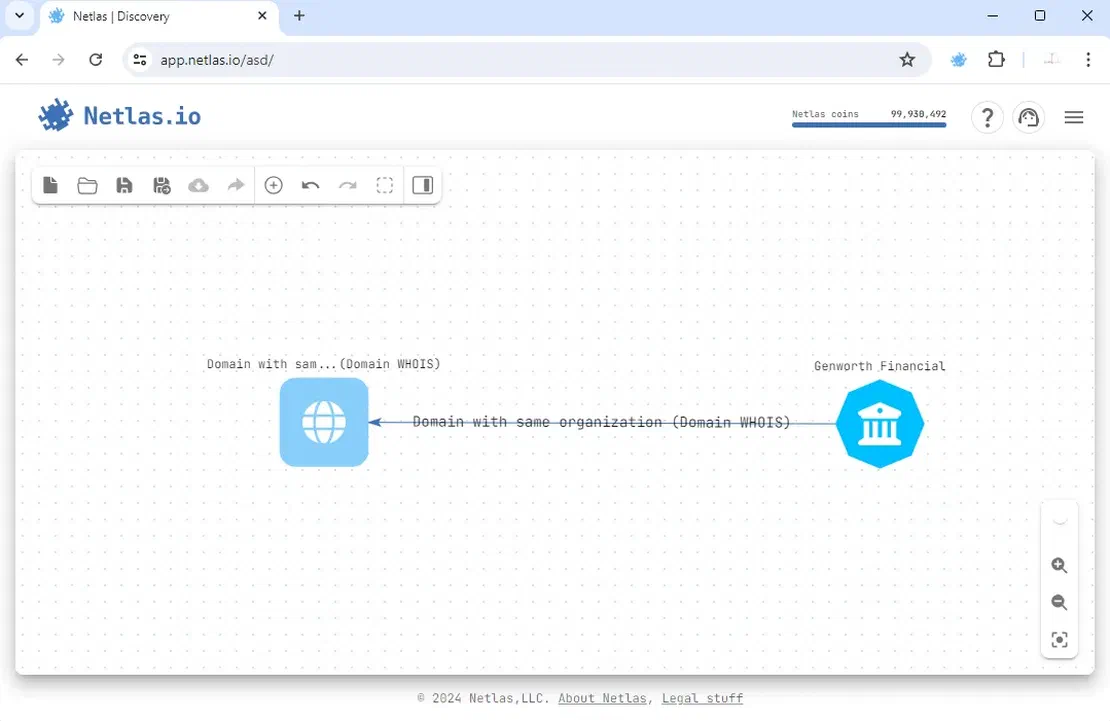
Start by adding a node of the “Organization” type to your surface in the Netlas Discovery Tool.
If you don’t know the organization’s name but know any of its domains, you can use that info. To proceed, add the domain type node to the surface and make an “Organization from WHOIS” search from it.
Next, with a list of organization names at hand, you can initiate searches starting from this node. Click on the node and select “Domain with same organization” to begin.
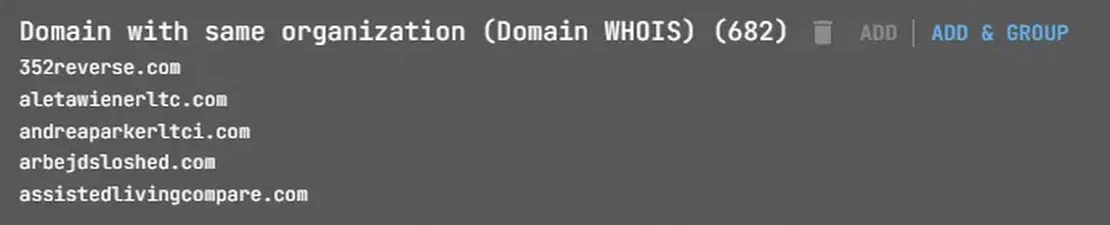
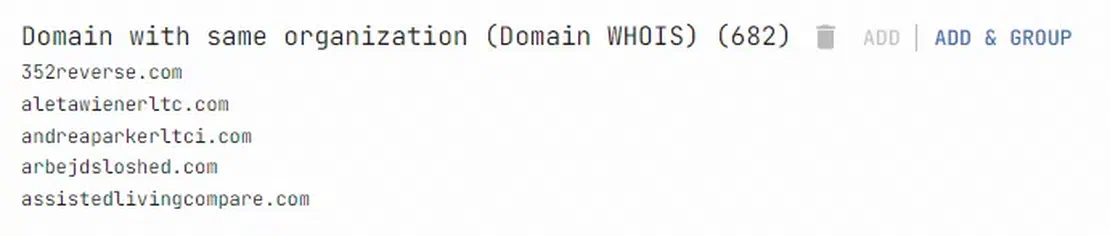
This will add a group with the root domains of the selected organization.
Root Domains, Alternative Way
You can utilize other tools to discover root domains. When working with WHOIS databases, it’s good to know various info repositories. For instance, you can use resources like whoxy.com.
By entering the name of the company you’re interested in, you’ll receive a list of domains registered to it.
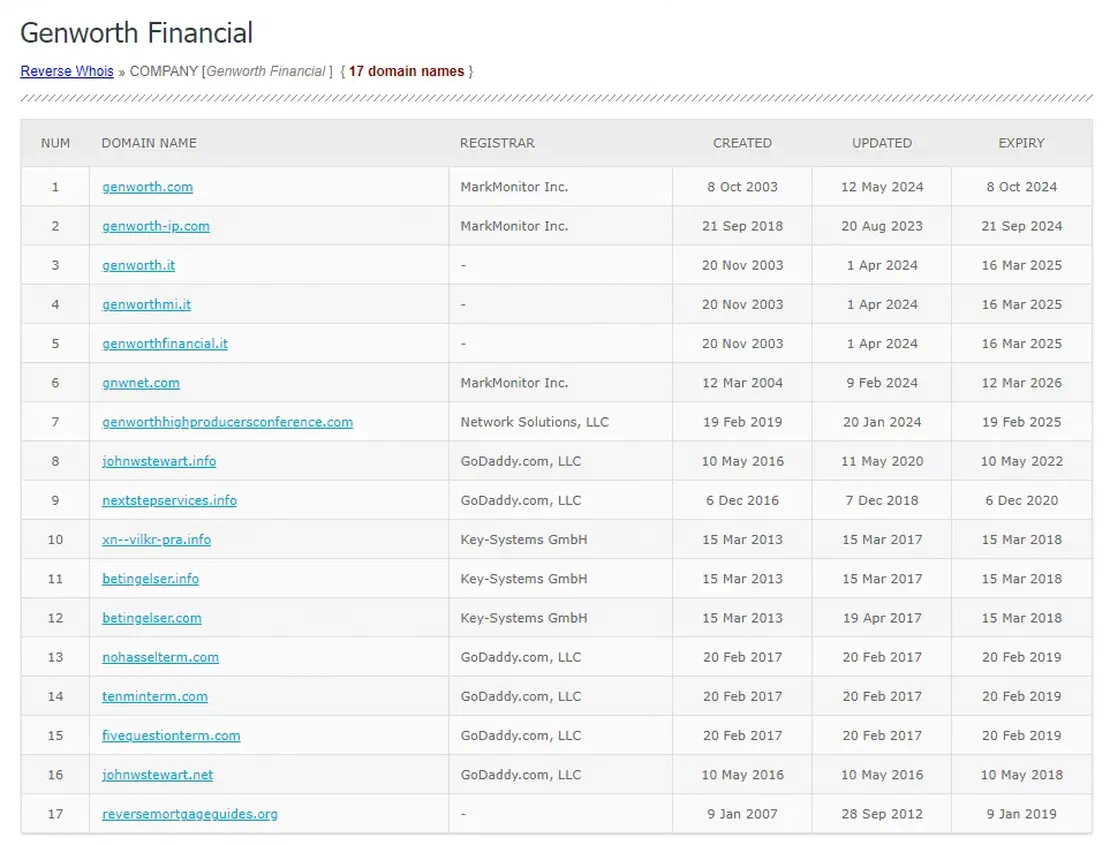
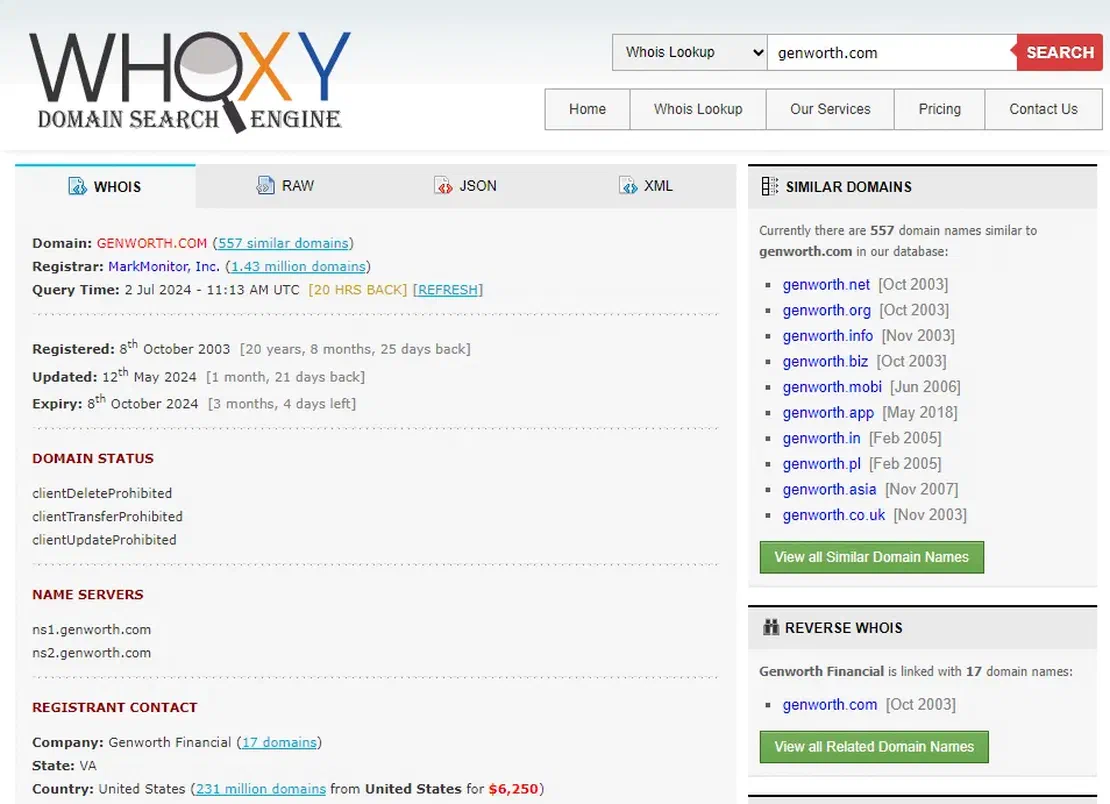
Any search engine that provides WHOIS data is suitable for these purposes.
Step 2: Root IP Addresses
The next stage is to find “root” IP addresses. They are subnets linked to the target company. You can discover these by using a similar approach to finding domains.


By adding a subnet and expanding it into IP addresses, we enhance our attack surface.
You may have noticed that, in addition to the subnet, a node with IP addresses has also appeared on the surface. This is because the Discovery Tool allows for more extensive searches from individual IP addresses compared to networks.
Root IP Addresses, Alternative Way
Subnet information, sourced from the WHOIS database, can be accessed through various services that provide such data.
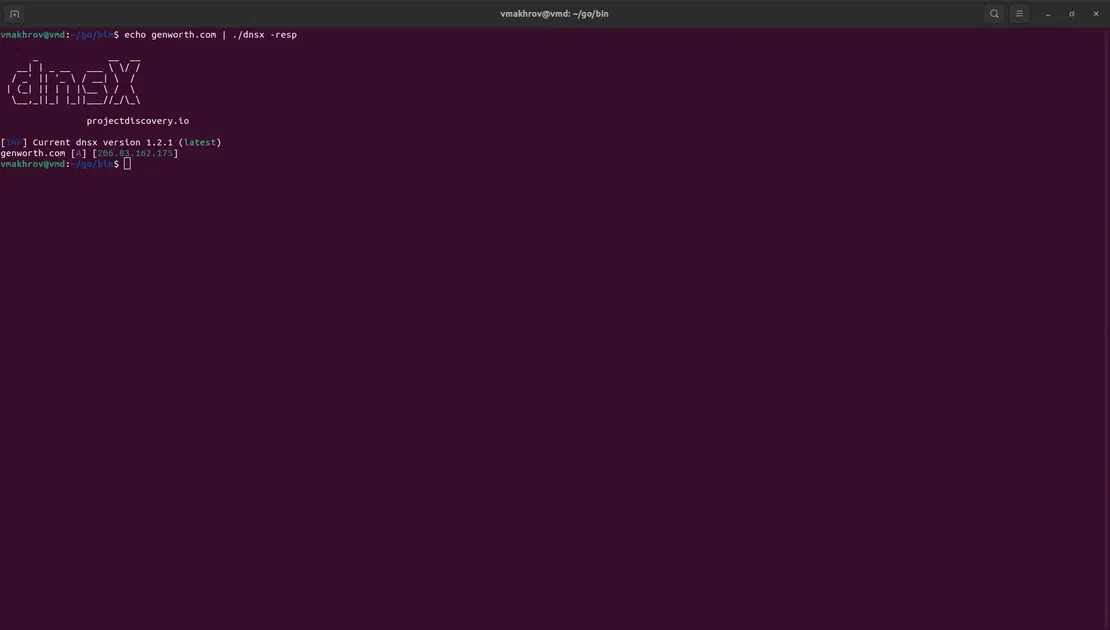
Moreover, in the initial step, we can derive IP addresses from the domain names. This can be accomplished using DNS tools like ProjectDiscovery’s dnsx to fetch the A-records associated with each domain. By combining this with WHOIS lookup services such as whois.com, you can gain insights into the addresses and subnets utilized by the company.
Step 3: Subdomain Enumeration
Finding subdomains is crucial for comprehensively building an attack surface. After collecting the root domains, the next step is to obtain all their associated subdomains.
To initiate this process, return to the “Root domains” node and search for “Subdomains” from there.

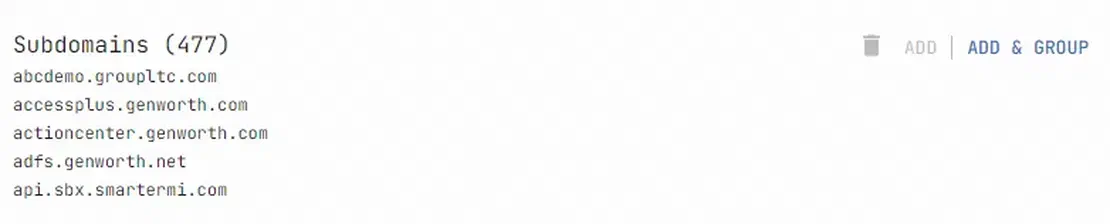
This will add another list to the surface.
Subdomain Enumeration, Alternative Way
Alternatively, you can use specialized tools for subdomain searching, such as Subfinder from ProjectDiscovery. Here’s an example:
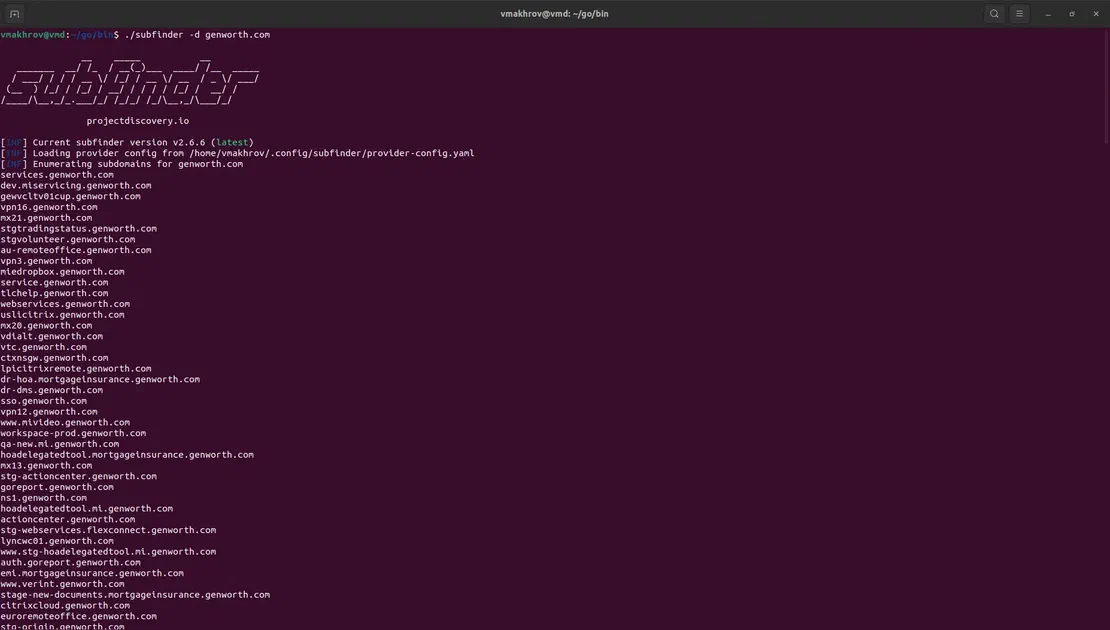
You can enhance your attack surface by providing Subfinder with a file containing a list of domains of interest, which will yield additional subdomains.
Step 4: Forward and Reverse DNS Lookups
The next important step is to analyze the DNS records. It starts with forward DNS lookups. First, let’s review the A records associated with our root domains. If you’ve done DNS research by another method, you can skip this step. You’ve already gathered the required records.
Otherwise, return to the “Root domains” node and search for “A records for domain” from there.
The next important record type is MX. It provides information about the mail server serving the domain. Very ofte, linked resources will have the same MX server. Use the search “Mailservers for domain”.


After this, it is worth studying NS records. It points to the DNS servers that are responsible for storing domain records. For the infrastructure of one company, NS records often coincide.


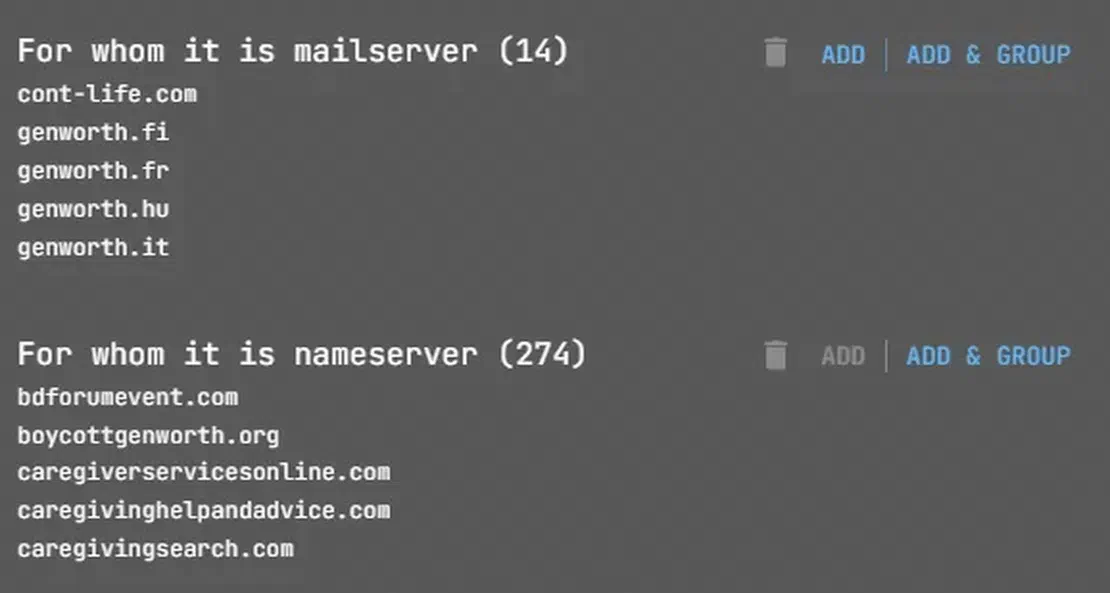
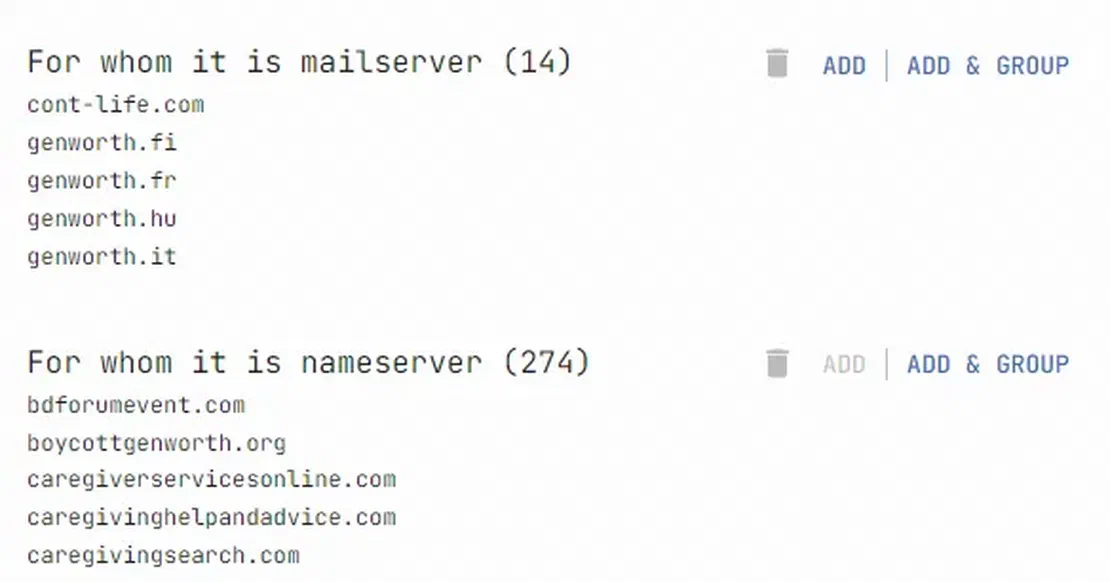
Next, in the corresponding nodes you need to select the searches “For whom it is mailserver” and “For whom it is nameserver”.
Additionally, it’s important to consider reverse DNS lookups. This helps to find domains tied to specific IPs via their A records.
There are typically two scenarios to consider here: whether the IP address belongs to a virtual host or not. In the former scenario, adding domains through reverse DNS might not be useful as they aren’t pertinent to our objective. However, in the latter scenario, these domains could expand the attack surface.
As we’ll later confirm, our situation falls into the first category. For now, let’s proceed by adding a node.
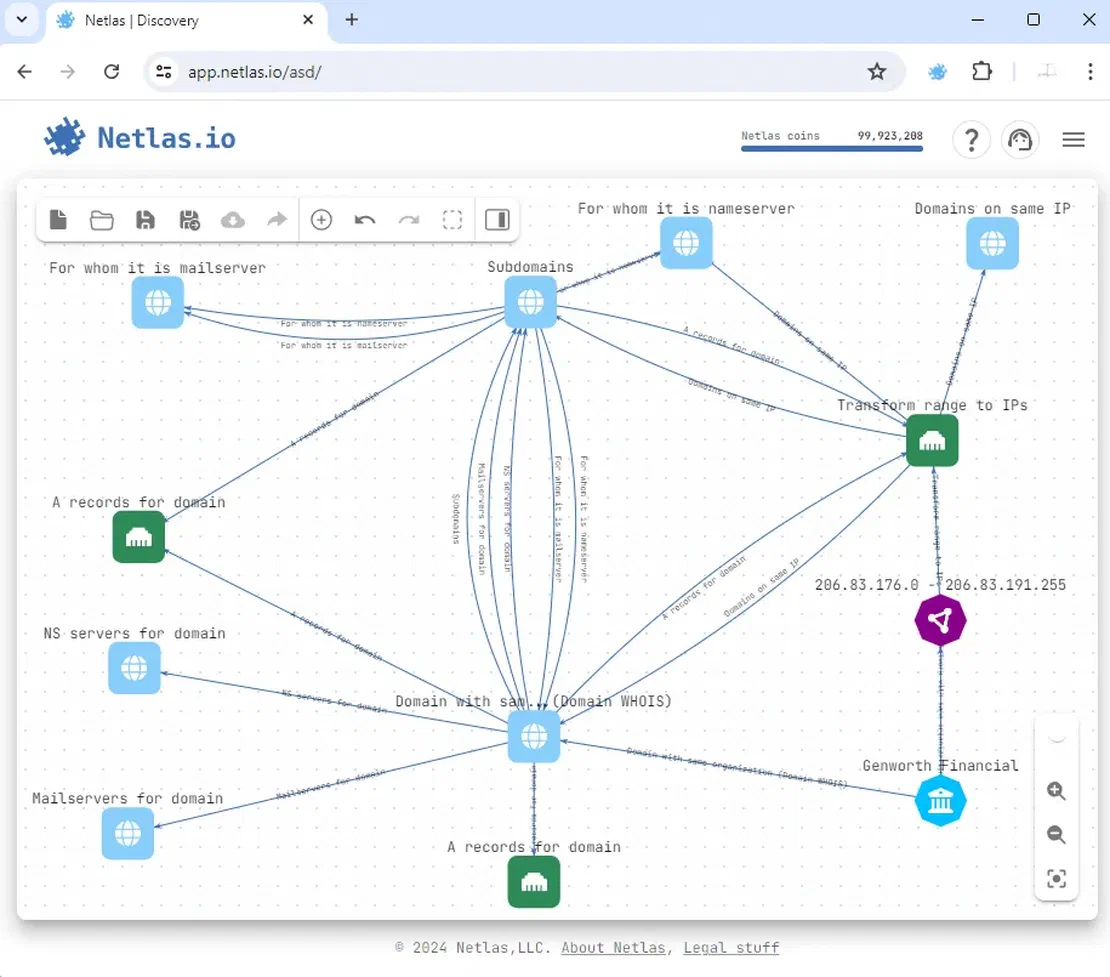
So, here is our surface after adding all DNS records:

Forward and Reverse DNS Lookups, Alternative Way
To get the necessary DNS records, you can again use a tool like dnsx. To do this, when using it, you just need to set the -recon flag, as shown in the following image.
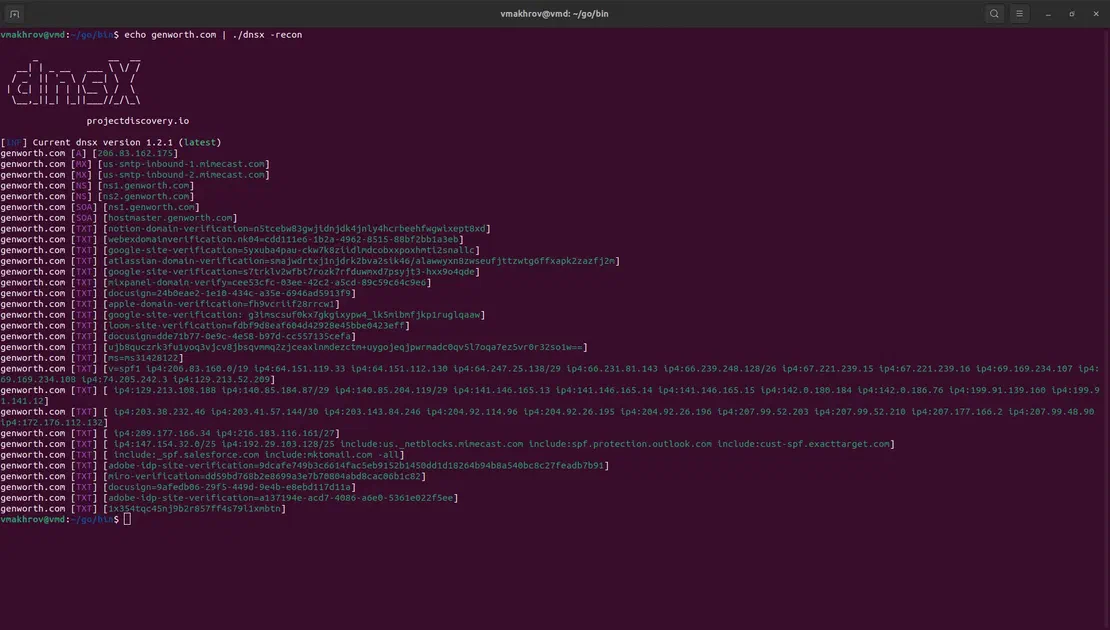
This will return all existing DNS records for the domain, allowing you to explore them further.
Step 5: Vertical Expansion
The next key step in building an attack surface is to pursue vertical expansion. This was partly addressed in the ‘Subdomain Enumeration’ step. Now, let’s examine the rest. The vertical expansion found: subdomains, exposed ports, contacts, and redirects.
To add exposed ports to the surface, use the “Exposed ports” search from an IP address or domain.


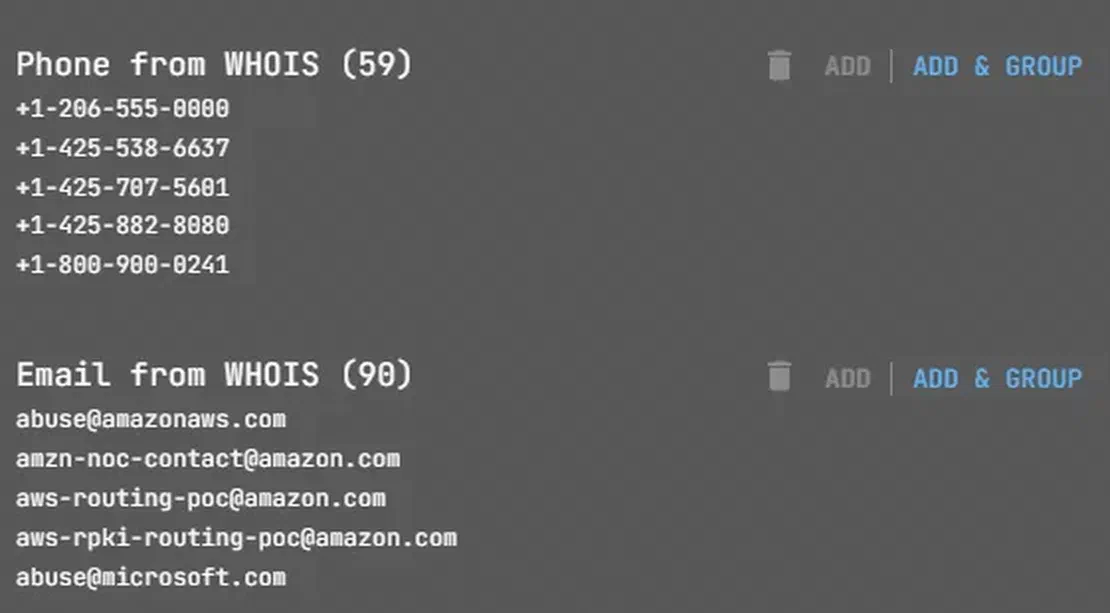
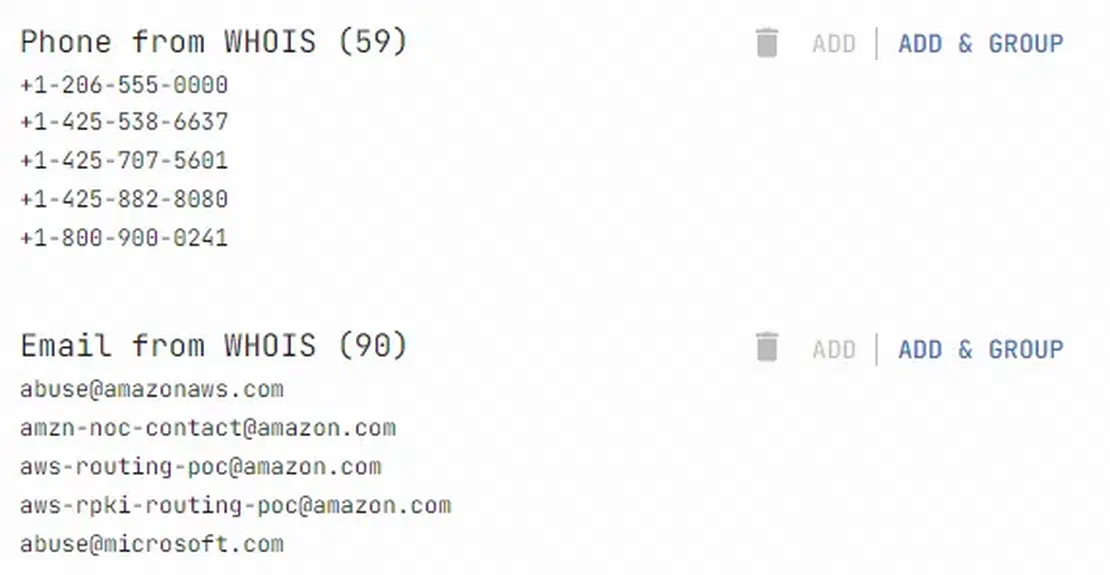
Contacts are stored in the WHOIS database: “Email from WHOIS” or “Phone from WHOIS”.
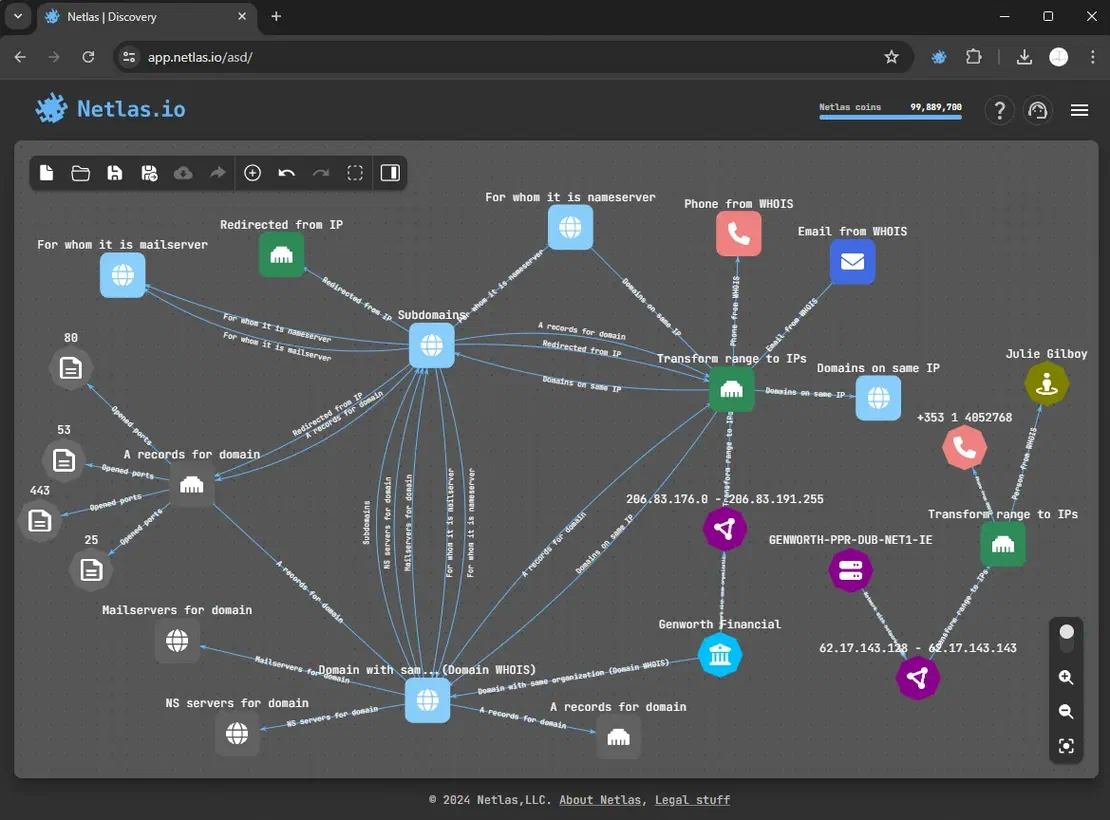
Finally, redirect searches. An example is shown in the following image.
So, here’s our surface after the searches.
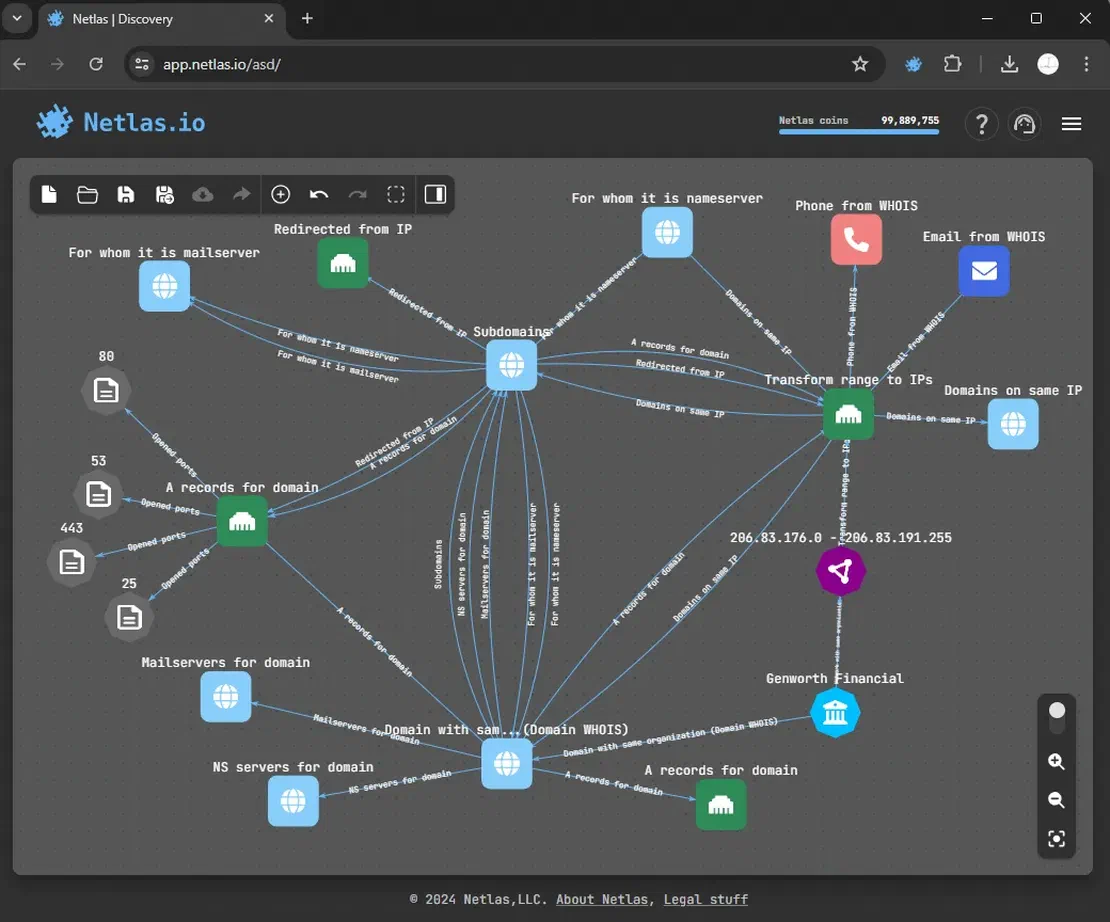
Step 6: Results Analysis
Once some objects have been gathered, it is vital to find which belong to the attack surface under examination.
Some of the organization’s resources might be hosted externally. This could be for better security or due to limited in-house management skills. It’s up to you whether to include those resources in the attack surface or not.
Using the Netlas Discovery Tool makes it easy to verify server ownership. Check the “AS Name” and “Organization from WHOIS” for ownership details.
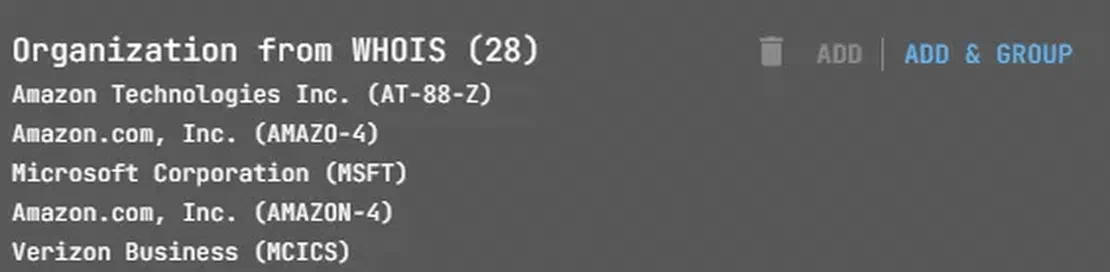
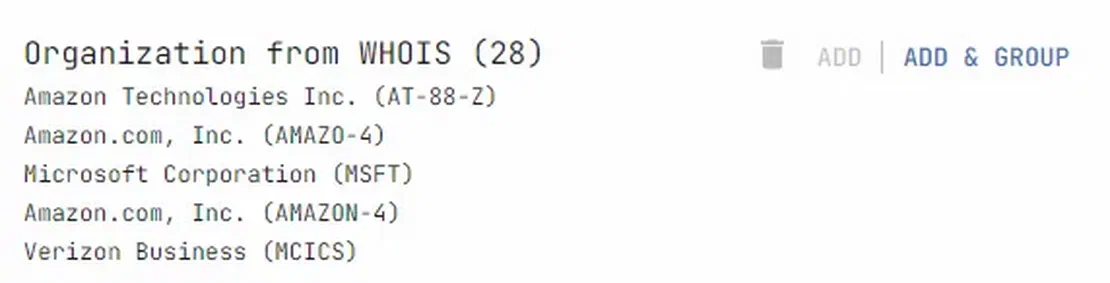
In our case, some nodes represent third-party hosts. Let’s exclude them from our surface. Simply right-click on the node and select the “Exclude node” option. In the future, you can hide these objects from the attack surface. They will not be in the file if you download the entire surface.
Results Analysis, Alternative Way
To check if a resource is on third-party servers, use a Domain/IP WHOIS Lookup tool like whois.com. Enter the domain or IP address to check the hosting details and ownership.

Step 7: Further Research
Companies often intentionally separate critical infrastructure from their main surface. In the final step, we will explore options to detect it.
If you know the name of the company, you can attempt to locate networks associated with that name. Here’s how you can do it using the Netlas IP WHOIS Tool:
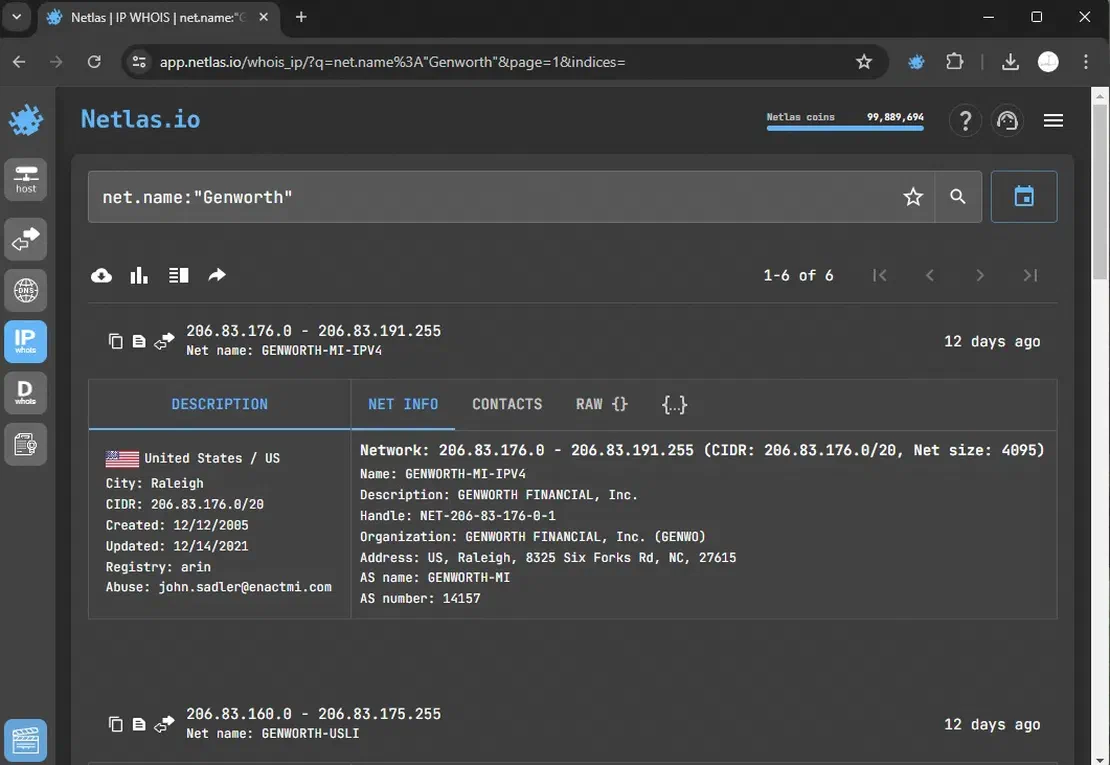
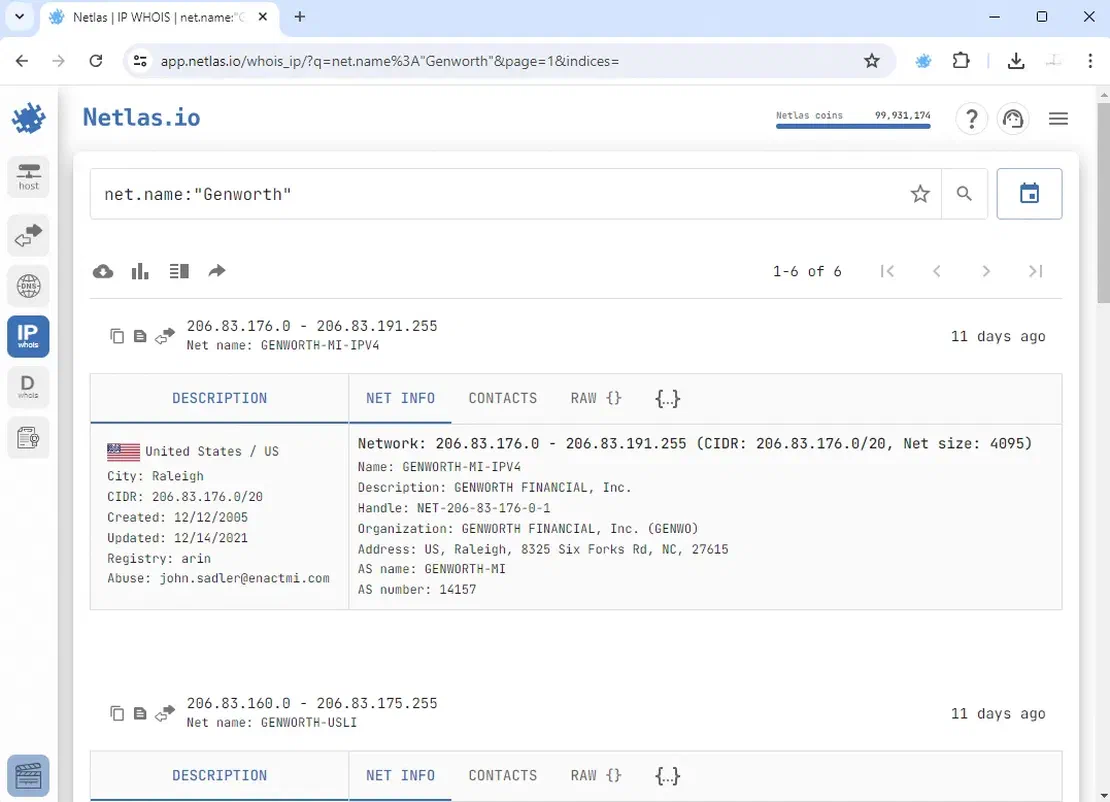
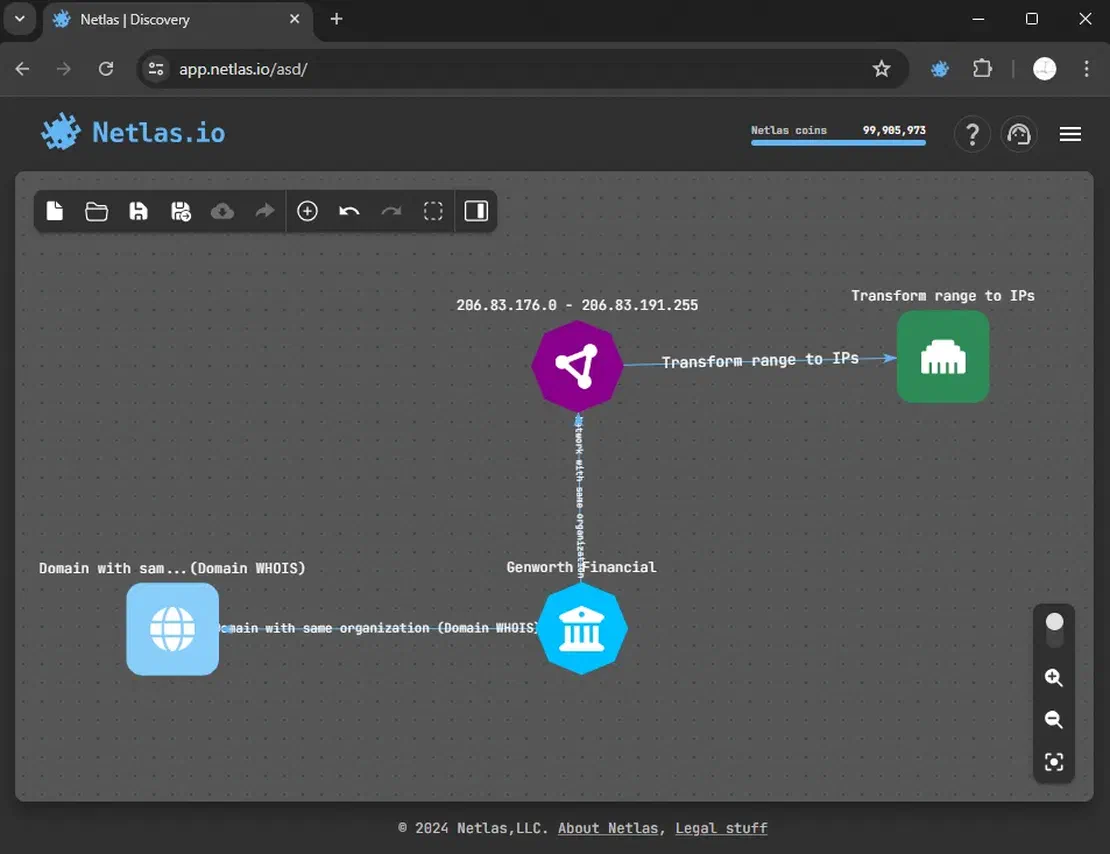
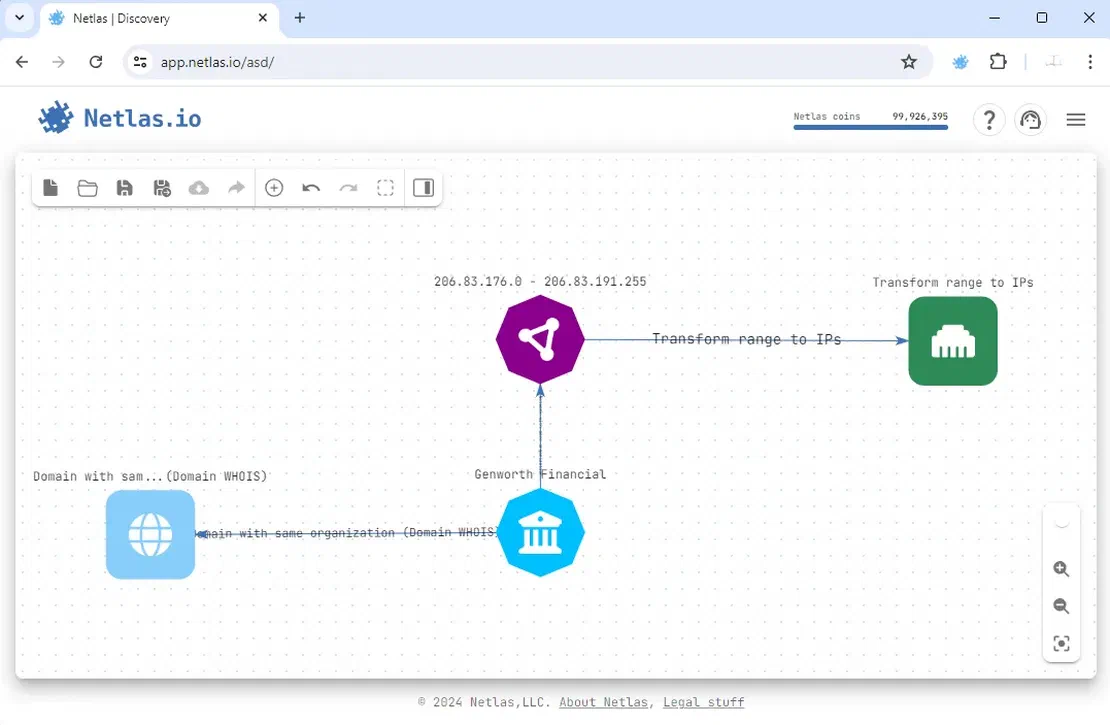
Abracadabra! We’ve discovered two additional subnetworks that were initially hidden during our reconnaissance. Let’s manually add them to the surface.
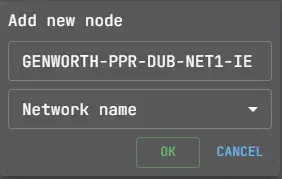
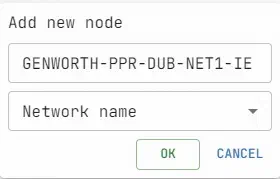
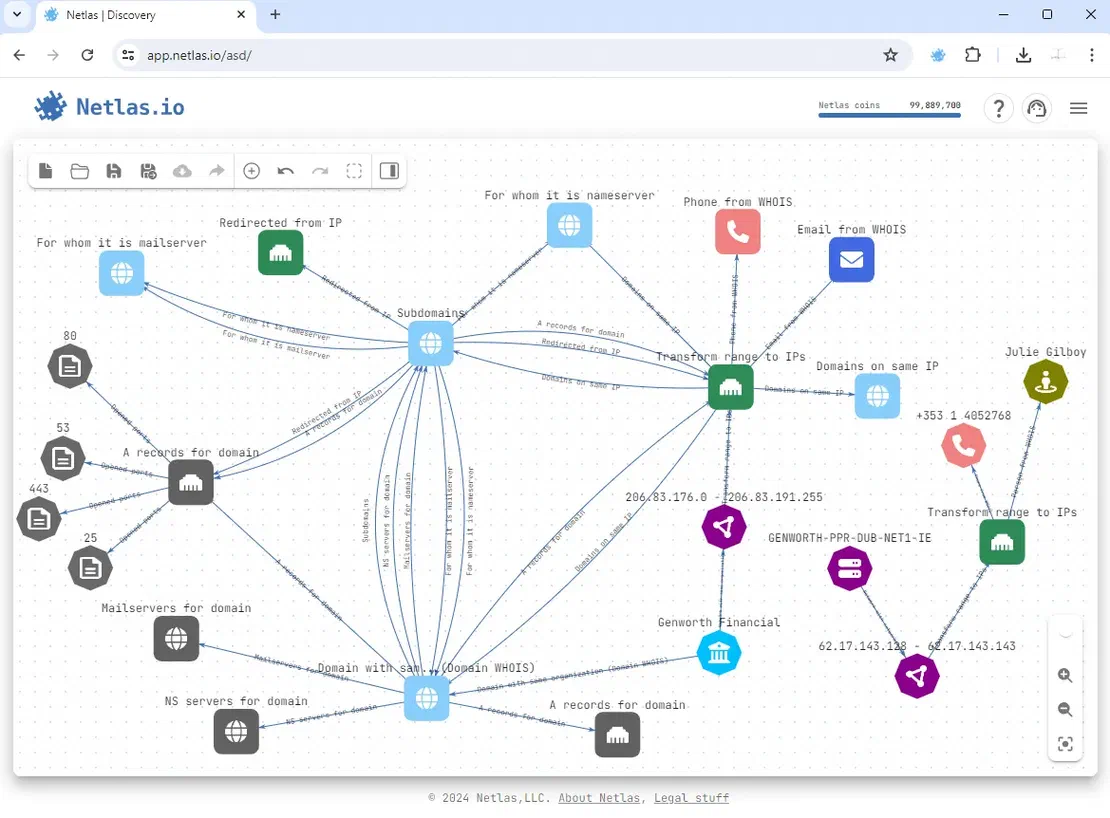
Next we need to transform it to a group of IP addresses. These entries rightfully belong in the attack surface, which is excellent news.
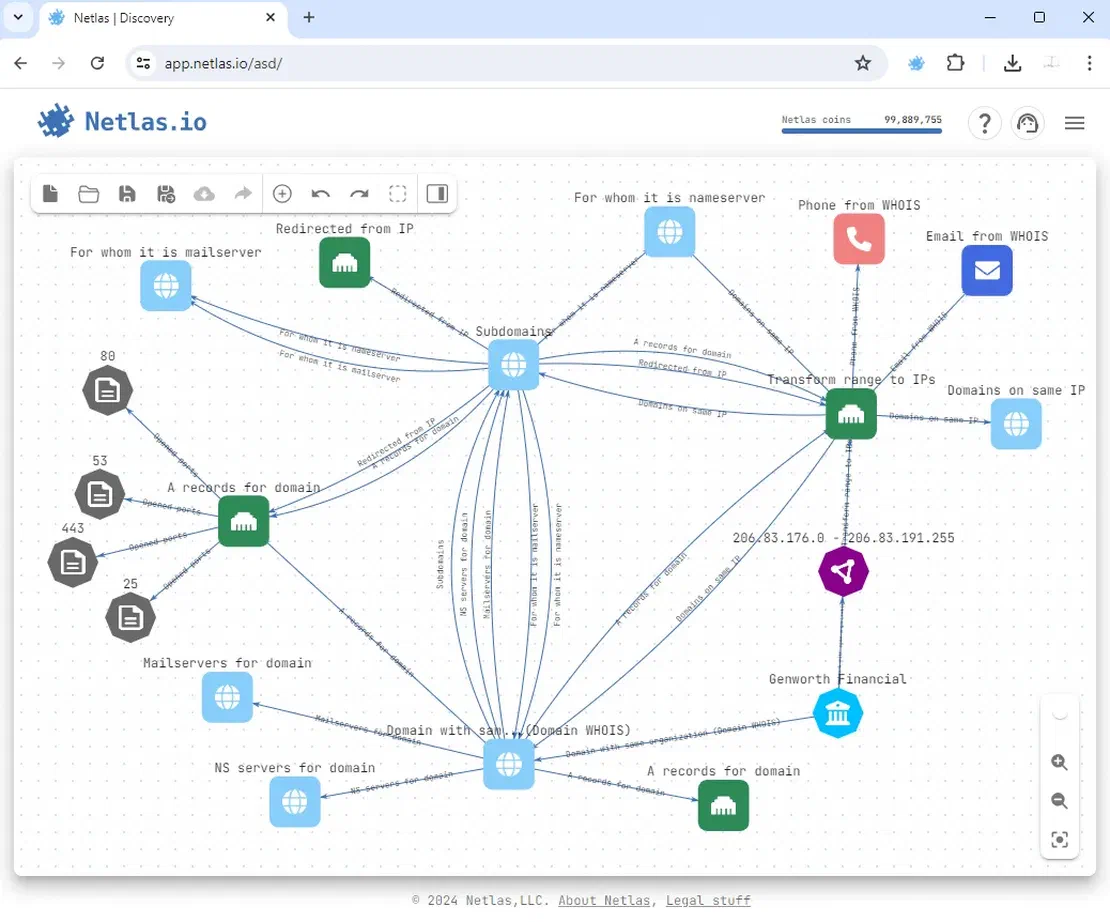
The final attack surface looks something like this:
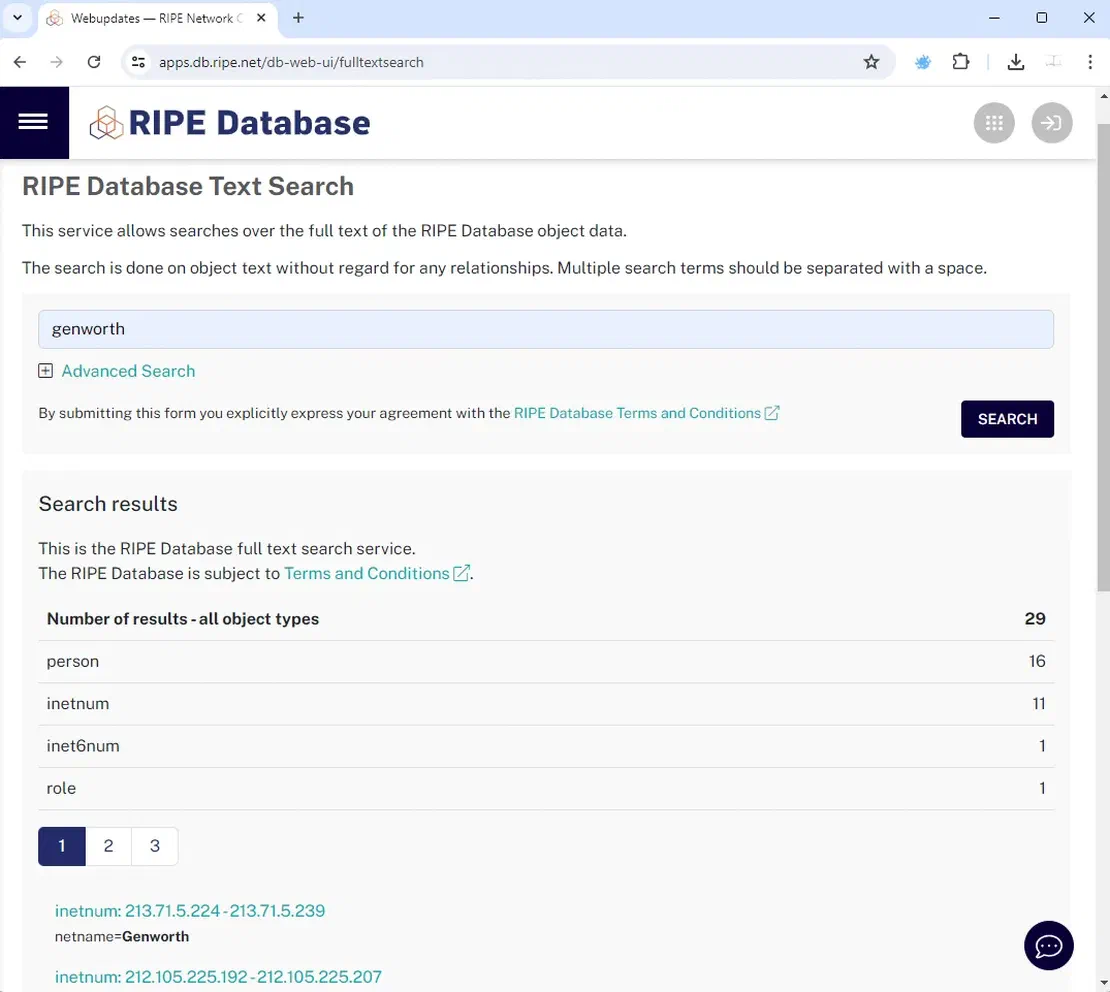
Further Research, Alternative Way
As in previous alternative methods, we will directly use the WHOIS database. For example, I used the RIPE Database, where I simply entered the name of our company:
Request Your Free 14-Day Trial
Submit a request to try Netlas free for 14 days with full access to all features.
Scanning the Attack Surface
After mapping the attack surface, the next step is to scan it for vulnerabilities.
With Netlas, you can easily scan the resulting attack surface using one of our tools — Netlas Private Scanner.
Additionally, you can utilize third-party applications by first downloading the surface as a text file, which includes IP ranges and domains. You can then use any scanner of your choice. Simply click the “Download” button in the top left corner.
We’ll discuss these options in more detail below.
Using Netlas Private Scanner
Private Scanner is one of the latest developments from Netlas, enabling you to scan your attack surface across more than 1,200 TCP and UDP ports. Following this scan, you will receive your own index that you can search through, similar to the functionality of the regular Responses Tool. While you can find more detailed information in the documentation, I will provide a practical example as a continuation of this article.
Creating Target List
There are two ways to upload your scope to Private Scanner.
In the first method, you can go directly to the tool and enter the details manually. To do this, open Netlas Private Scanner and click on the “New Scan” button:


After this, you will open a form in which the target resources must be entered:
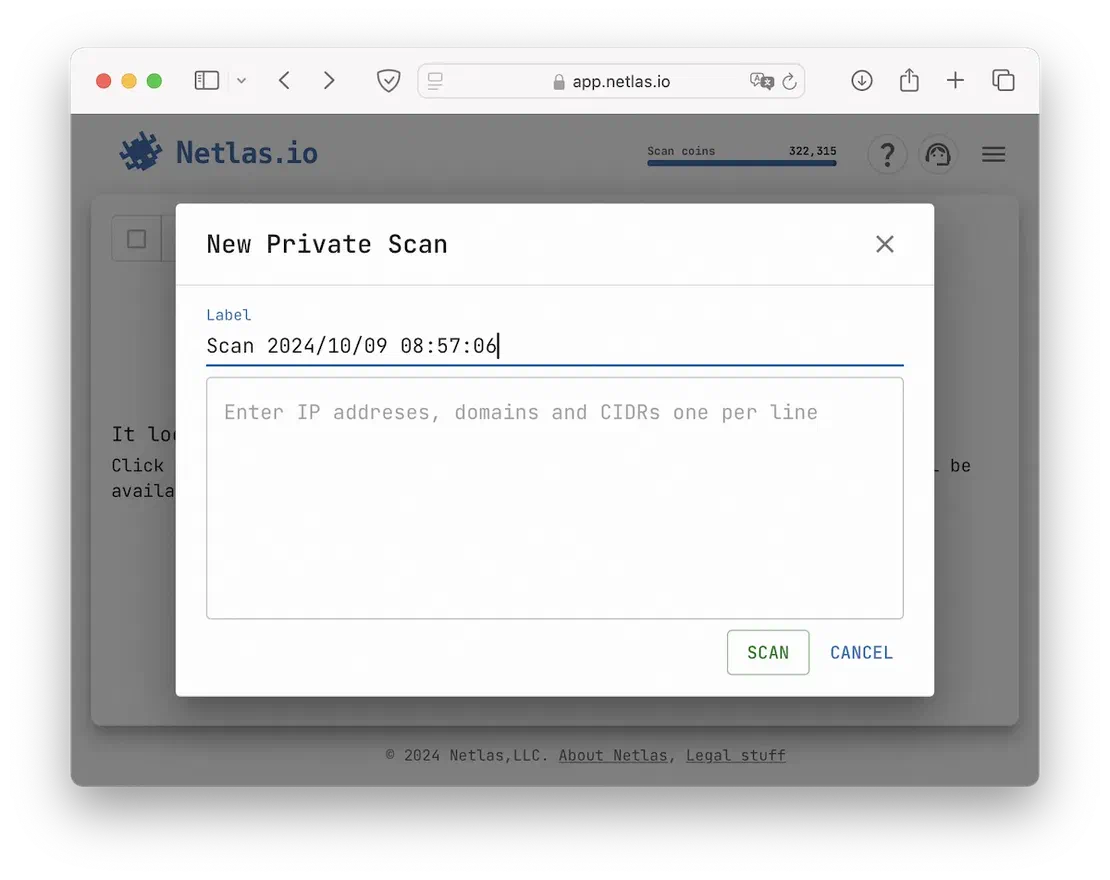
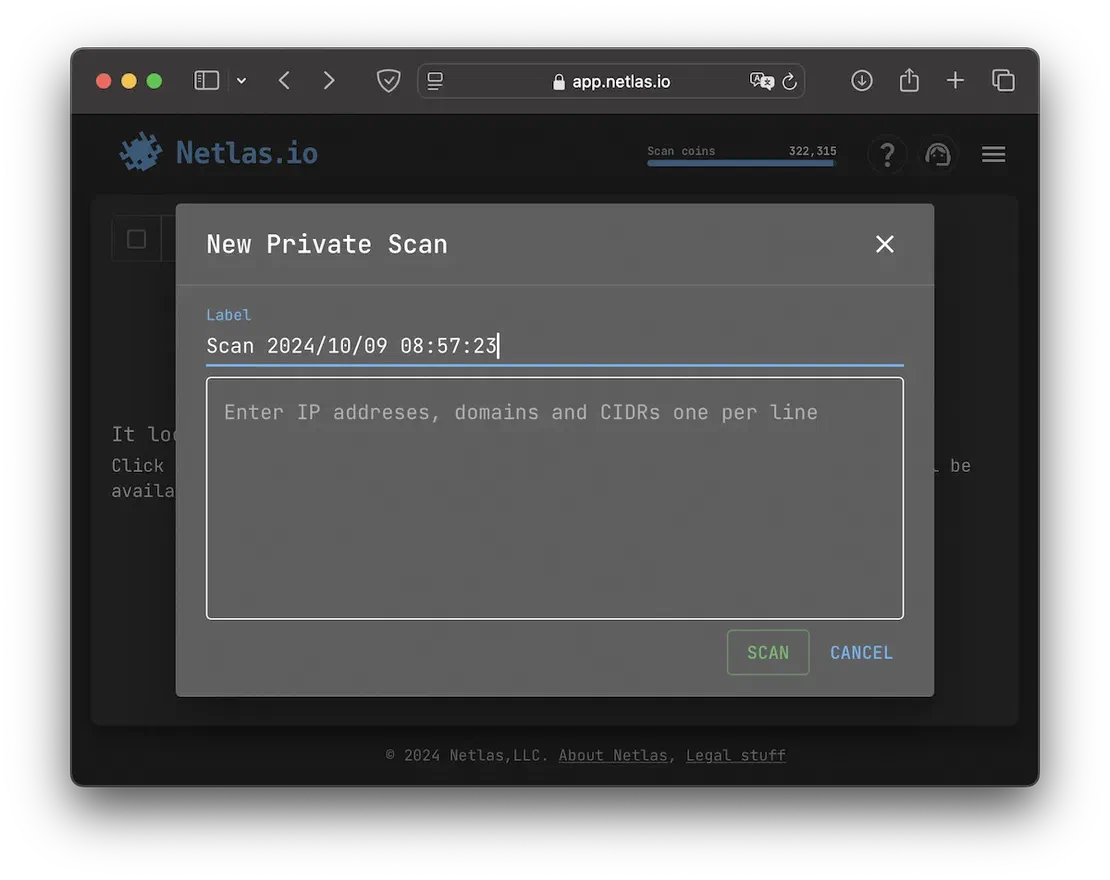
This is where you enter your target entities, such as domain names, IP addresses, and CIDRs.
The second method for creating a scope is to load it from an existing Attack Surface that you built using the ASD Tool. To do this, simply click the corresponding button in Private Scanner:
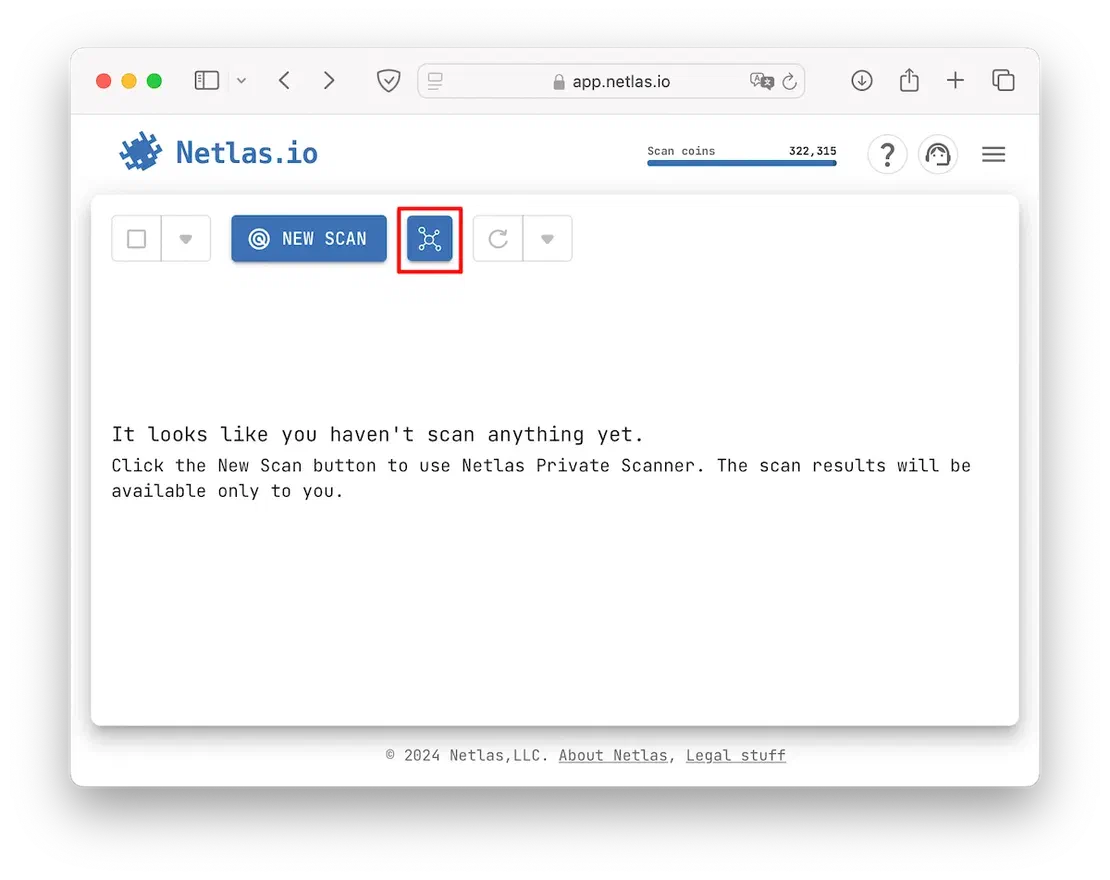
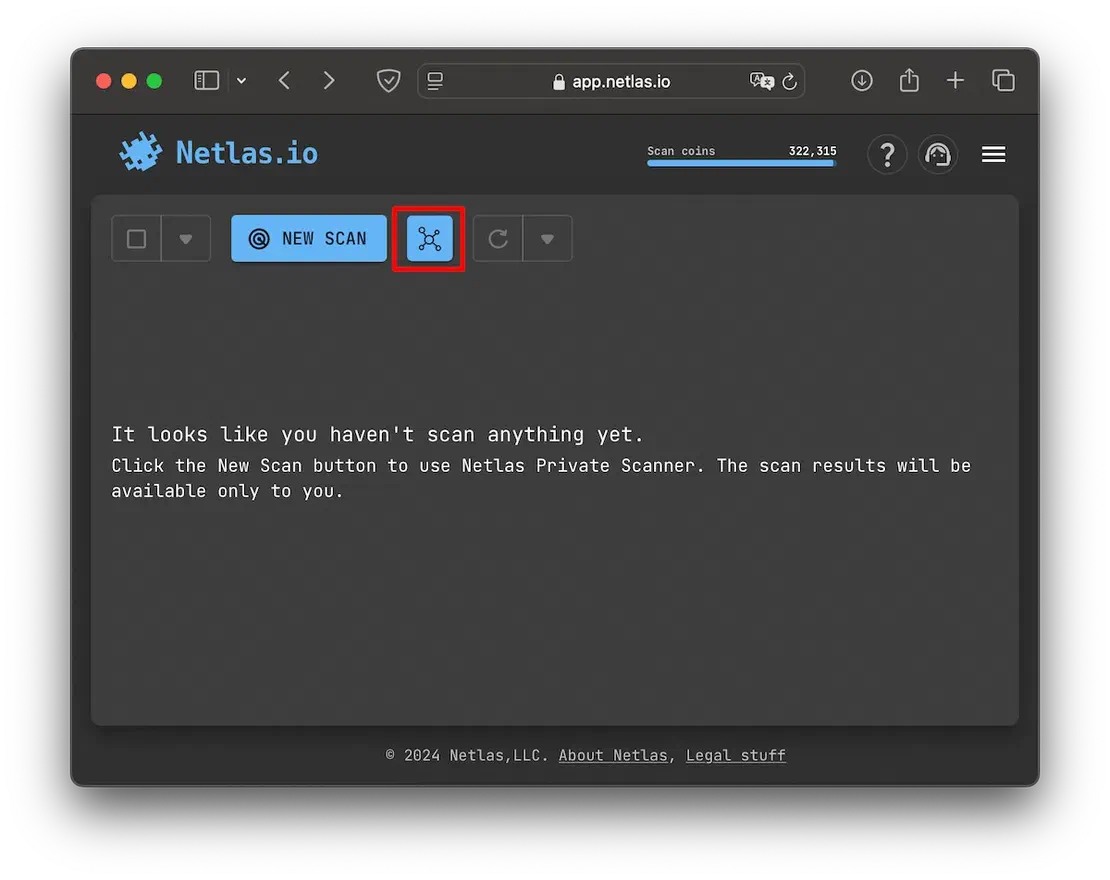
Next, select the desired Surface, and the targets will be loaded.
You can also download the scope directly from ASD. To do this, open the desired graph and click on the “Scan” button:
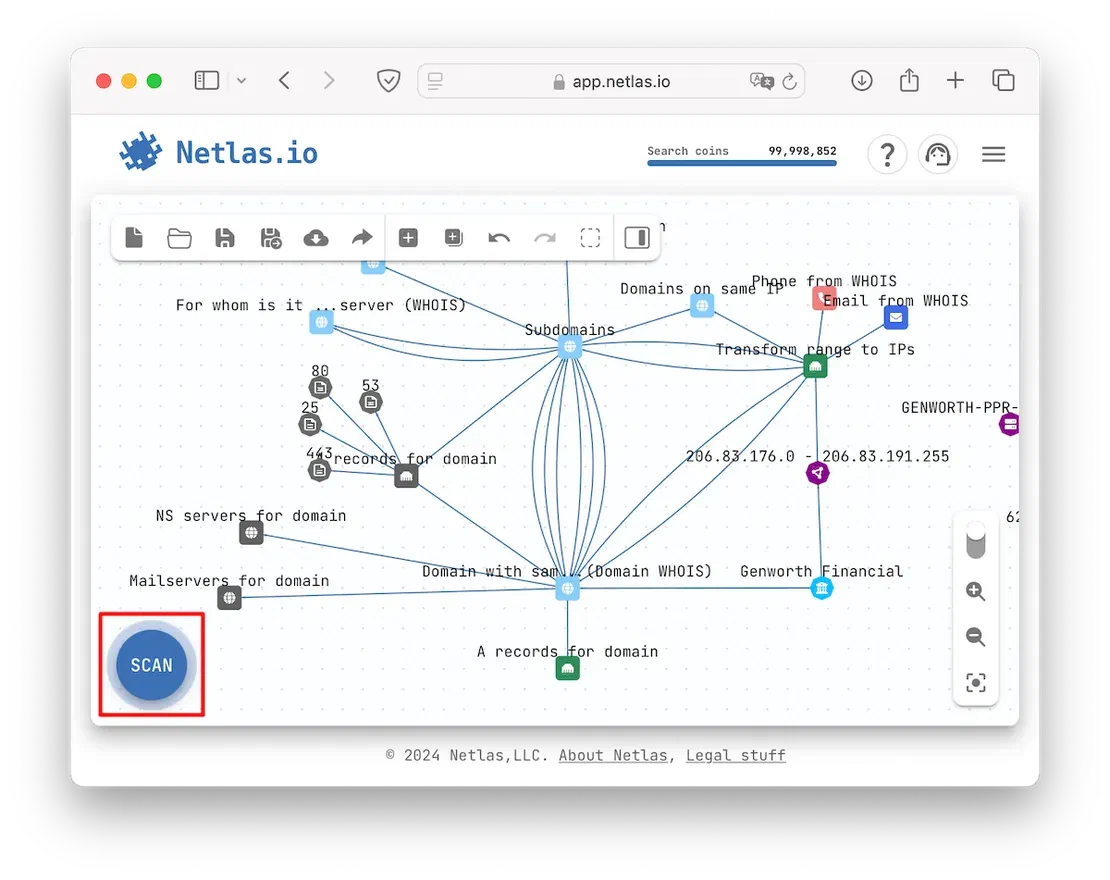
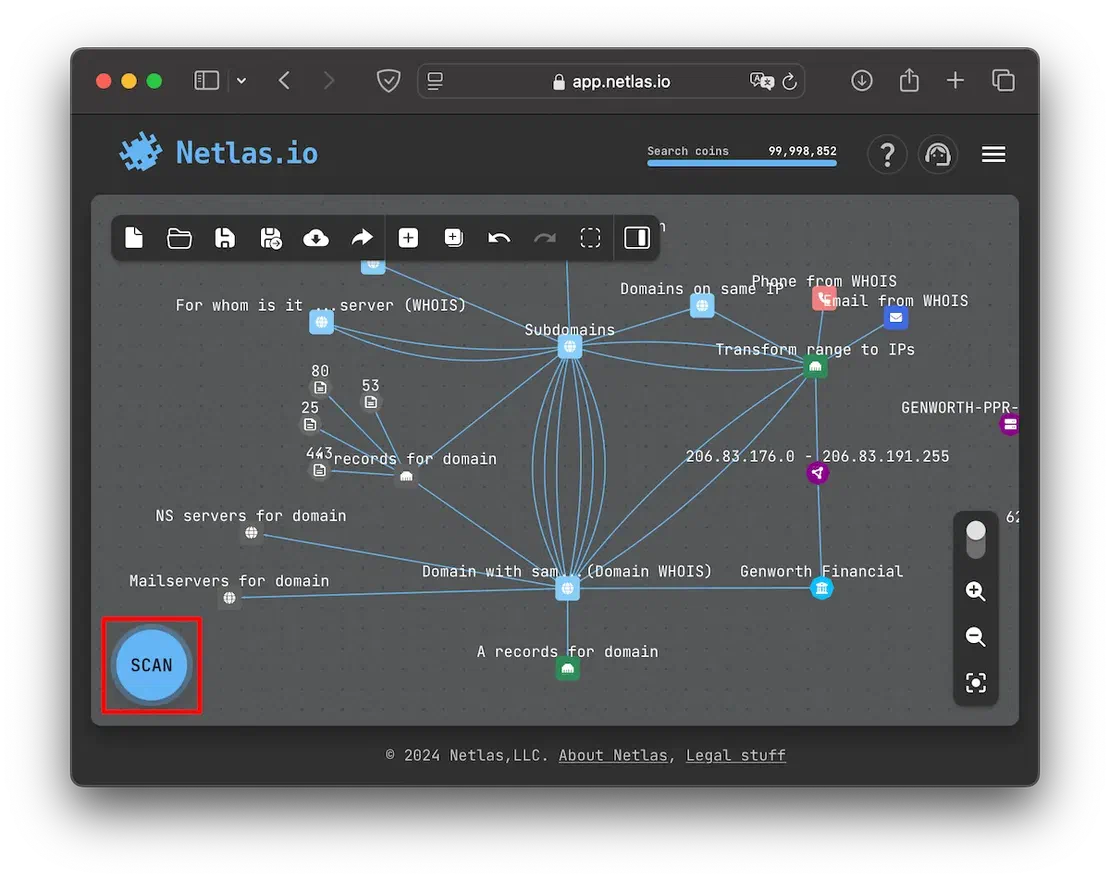
After this, the scan will be created automatically. Now we can proceed to the next sub-item.
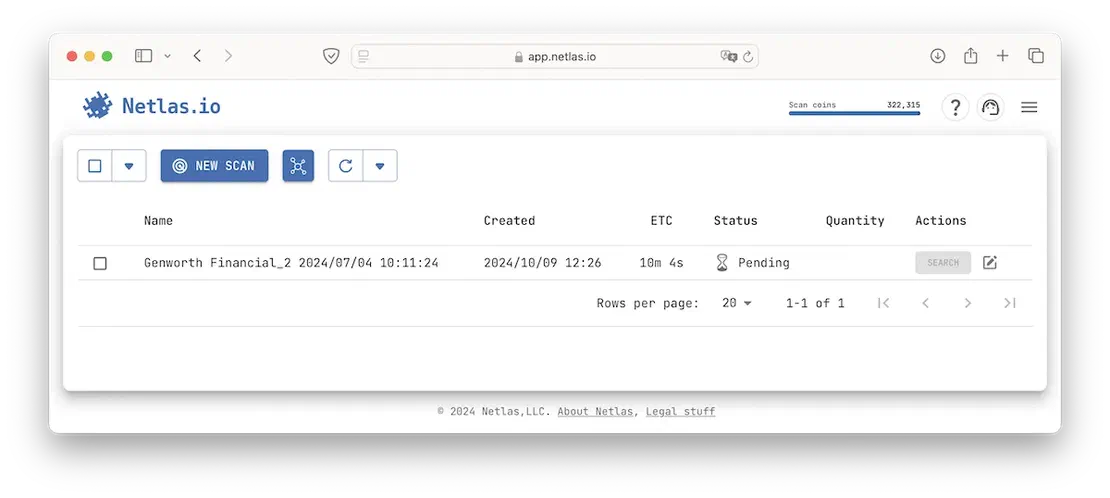
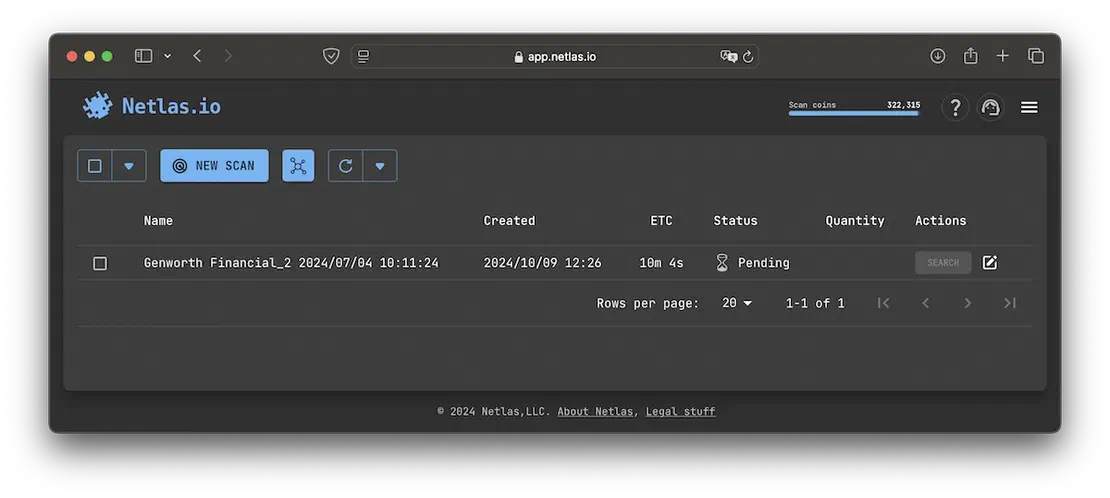
Scan in Progress
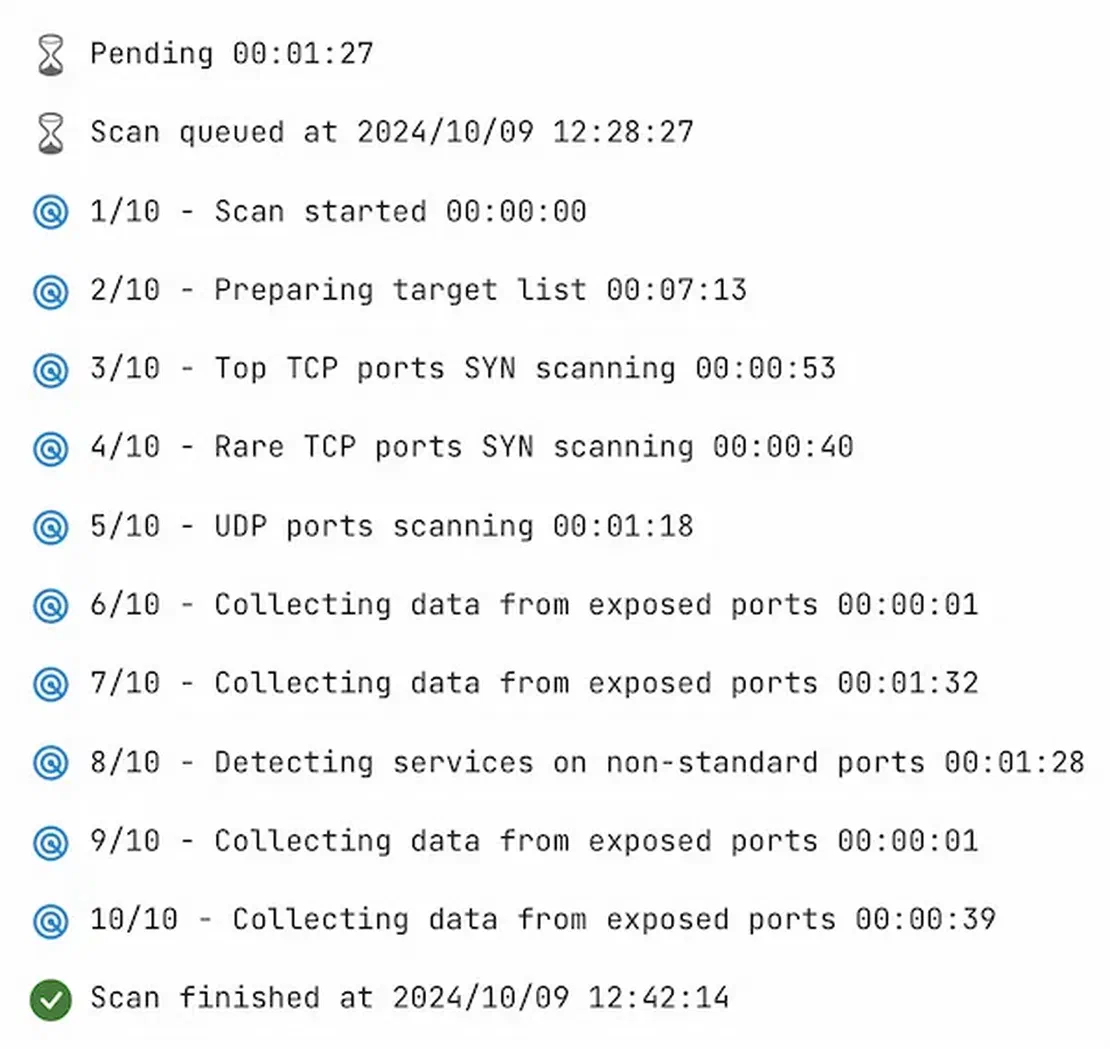
Once you have finalized your list of targets and initiated a scan, you’ll need to wait for a while. The scan progress will look something like this:
The duration of the scan depends on the list of targets; in my case, it took approximately 12 minutes. During this time, the scanner went through the following stages of operation:
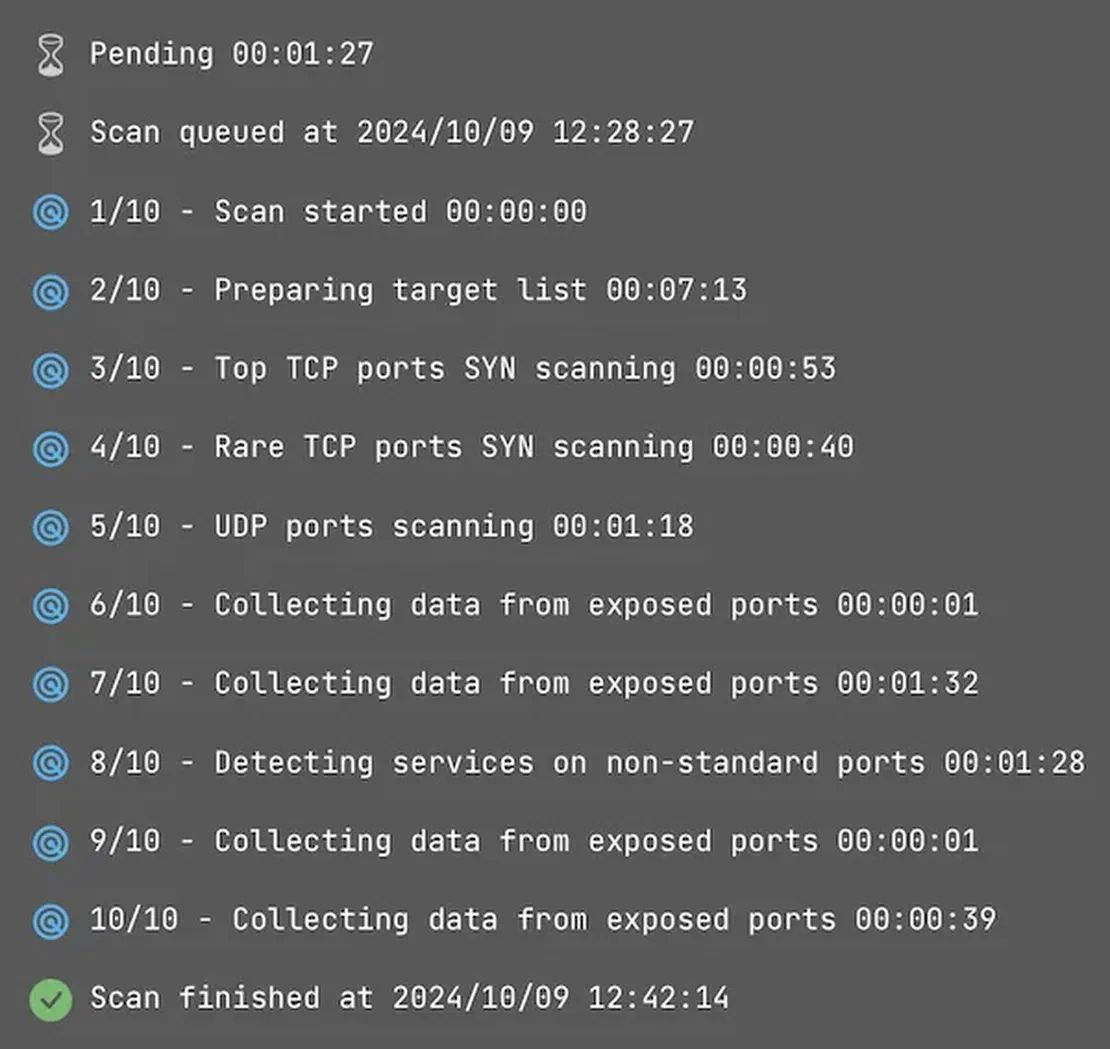
So, now we can go to search in new index.
Search in Private Scan
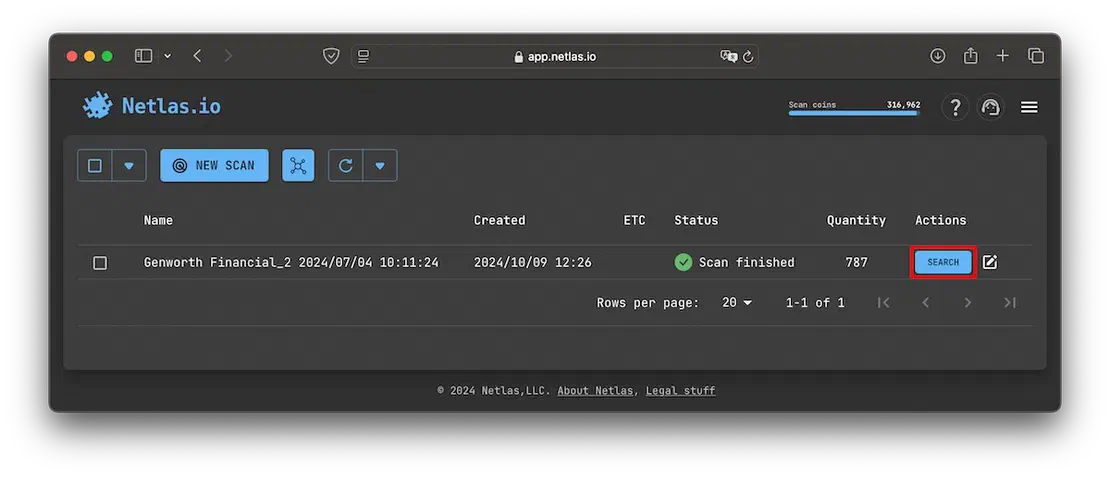
Once the scanning is complete, you can access the Responses Tool directly by clicking the “Search” button:

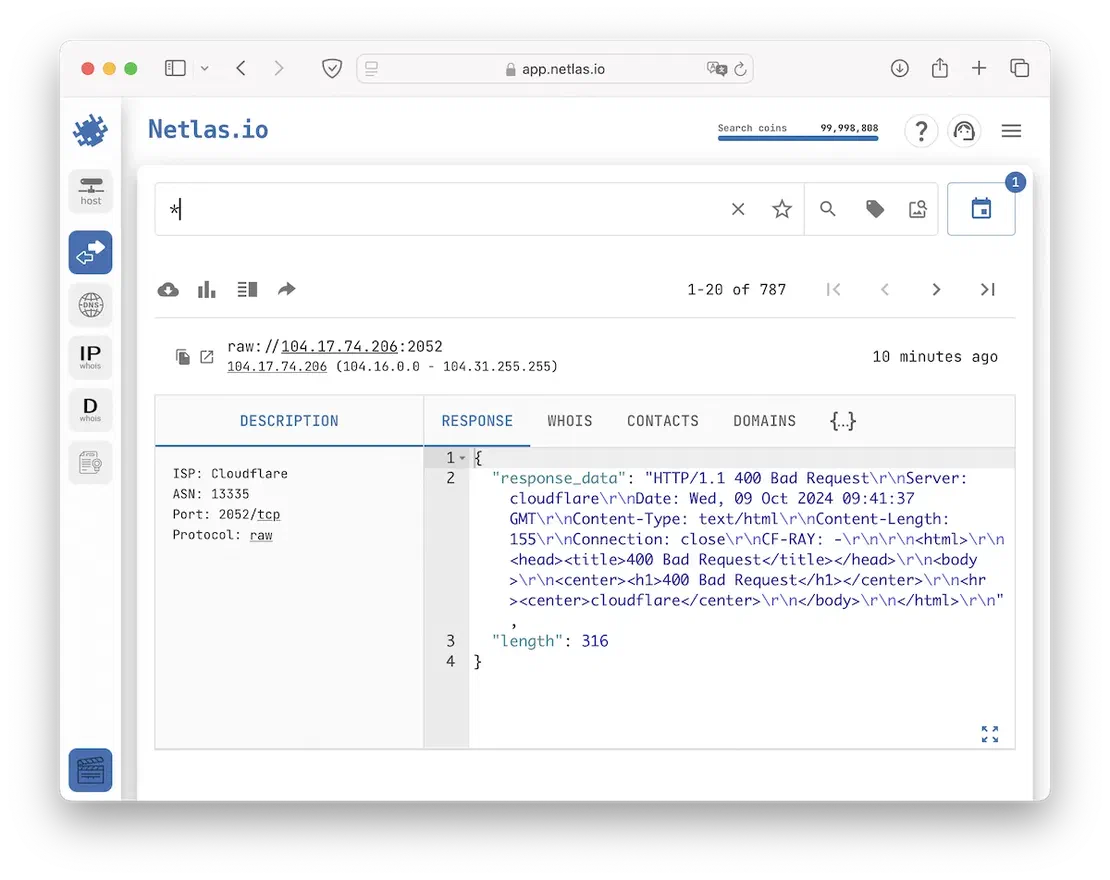
By navigating to Responses, you will automatically open a private index that contains only the data from your scan. This is what it looks like:
You can now search the scanned surface in the same way you would with standard indexes in Responses. If desired, you can switch the scan to a general one using the corresponding button.
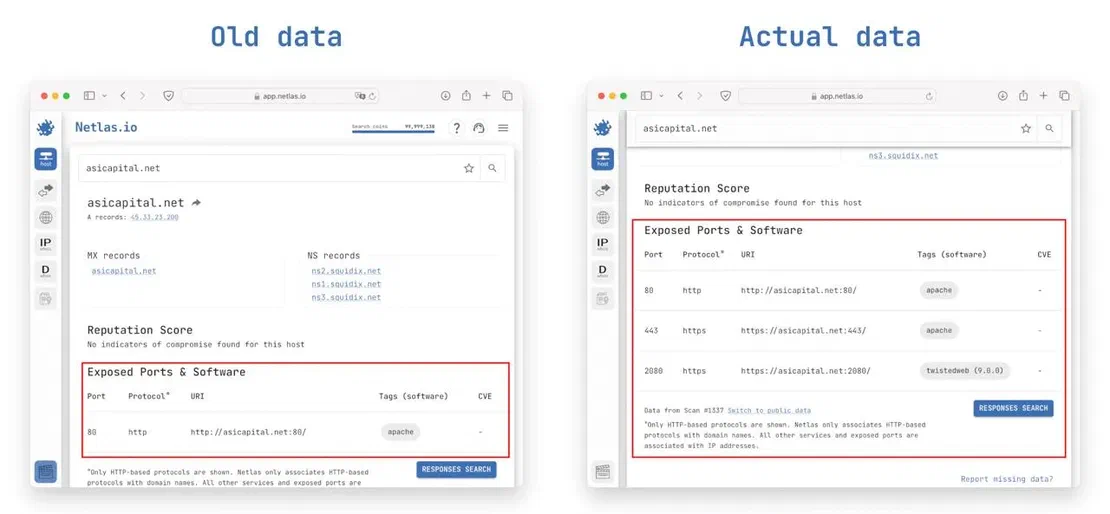
Additionally, the presence of a private scan automatically updates the information in the Host Search Tool if the latest data differs from the previous entries. It looks like this:
Getting List of Endpoints
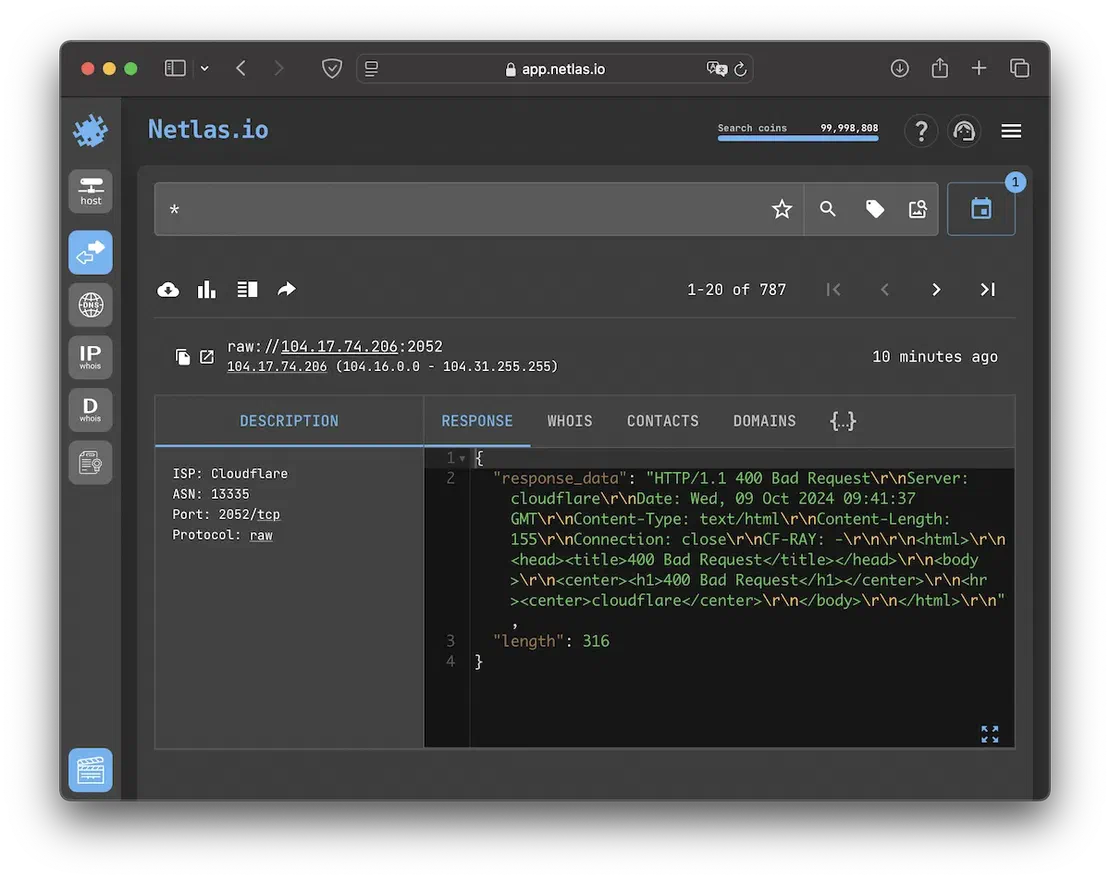
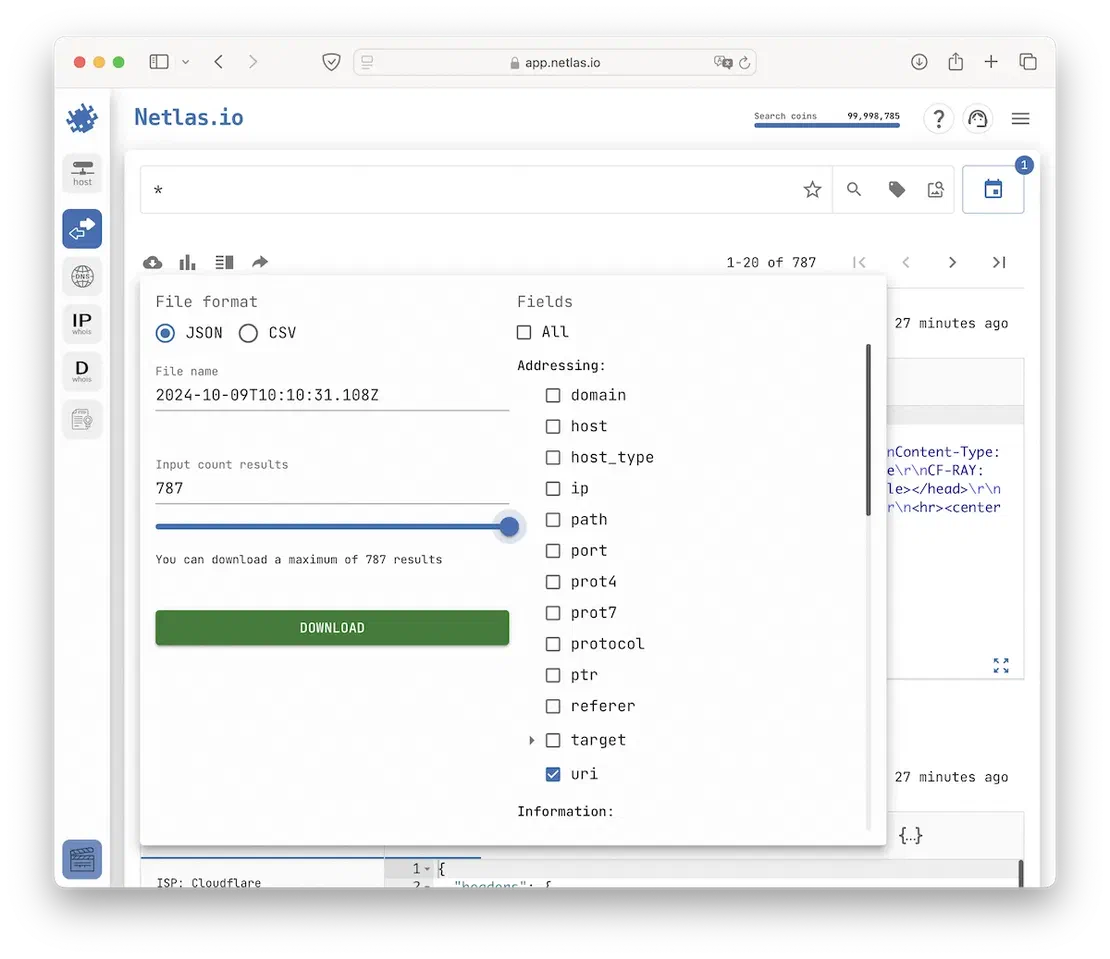
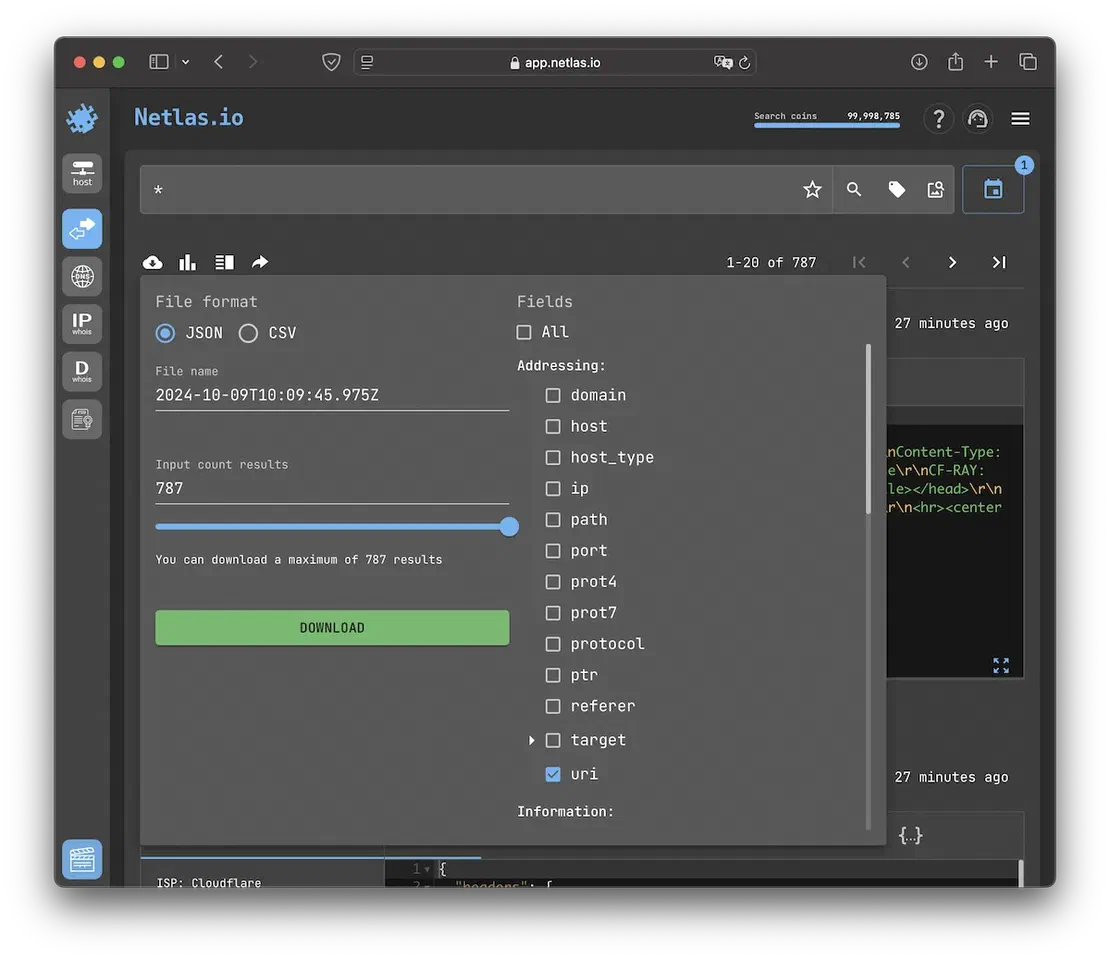
So, by conducting separate searches and reviewing the latest data, you can download all discovered endpoints as URIs, which represents the final step in Attack Surface Discovery. To achieve this, make a request "*", which will display all the data from the private scan and allow you to download all the necessary information:
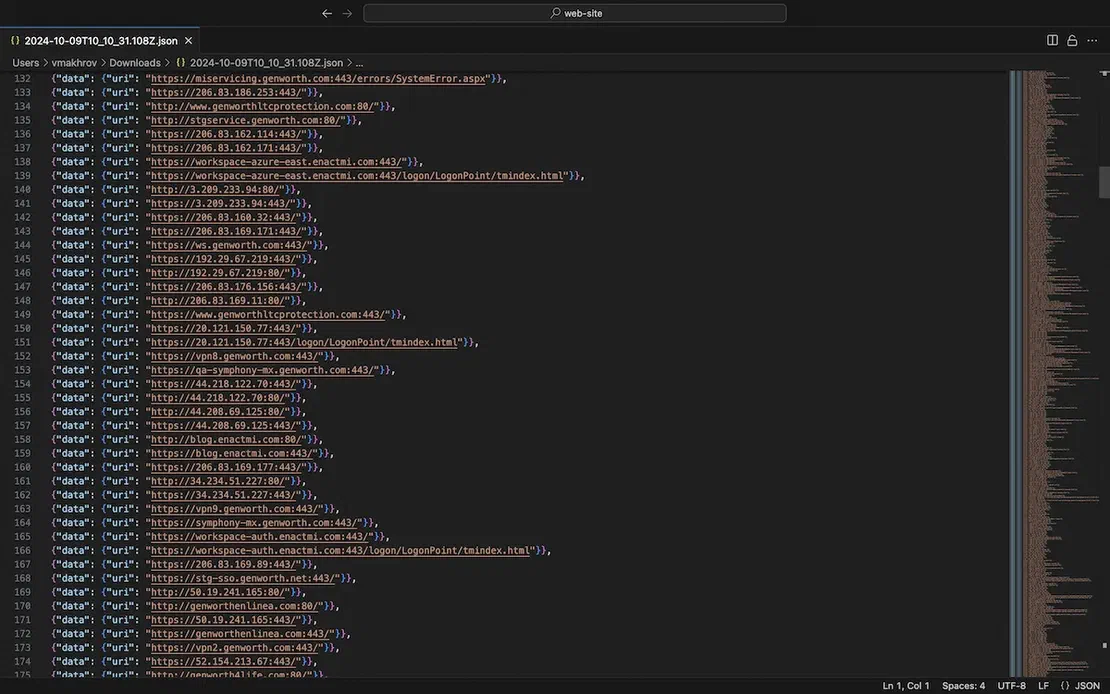
And here the result:
Netlas Private Scanner Restrictions
Finally, there are two important limitations to note regarding the use of this tool:
- Private Scanner is available to paid Netlas users, beginning with a Freelancer-level subscription. Exceptions apply to special tiers such as Demo or Education, which can be accessed upon request.
- When using Private Scanner, the user spends one Scan Coin for each scanned target. It’s important not to confuse these with Search Coins!
Using External Scanners
If using Netlas Private Scanner seems impractical for any reason, you can explore various utilities designed for scanning. Some popular scanners you might consider include:
- Nmap: A powerful network scanning tool that can discover hosts and services on a network, providing a detailed view of the network topology and potential vulnerabilities.
- Nessus: A comprehensive vulnerability scanner that can identify security weaknesses in your systems.
- OpenVAS: An open-source vulnerability scanning tool that provides detailed reports on security issues.
- ZAP (Zed Attack Proxy): An open-source tool for finding vulnerabilities in web applications.
- Burp Suite: A comprehensive platform for web application security testing.
Consideration of the pros and cons of network scanners is beyond the scope of this article.
Conclusion
The main phase of attack surface discovery is now complete. We recommend you try the Netlas Discovery Tool. It stands out for its ease of use. It helps find connections and visualize the surface. Building complex attack surfaces with such a tool is done almost intuitively.
You should also keep in mind that the methods shown here are just the tip of the iceberg. For instance, you can find connections between different sites using a favicon search or searching by Google tag. The Netlas Responses Search can assist you with this.

Book Your Netlas Demo
Chat with our team to explore how the Netlas platform can support your security research and threat analysis.
Related Posts

July 13, 2024
Best Attack Surface Visualization Tools

March 21, 2025
Netlas vs ZoomEye: Platforms Comparison

December 27, 2024
Using theHarvester with Netlas

March 20, 2026
How we hunt C2 infrastructure at RST Cloud using Netlas

September 12, 2025
Bug Bounty 101: Top 10 Reconnaissance Tools

February 12, 2025
Netlas vs Censys: Platforms Comparison