


Bug Bounty 101: Top 10 Reconnaissance Tools
September 12, 2025
16 min read

Previously, we explored bug bounty programs and top courses to get started. Now, let’s look at some tools that will make your bug bounty journey more focused and easier to manage. In this article, we’ll review some of the most common tools used in bug bounty.
Introduction to Bug Bounty Tools
Once you start with bug bounty, you’ll quickly realize that methodologies, knowledge, and theoretical understanding alone aren’t enough. You’ll also need some tools to get started or to get a clearer picture of your target. Think of it like cooking a meal — you know the recipe, but to actually cook, you’ll need tools like knives, a spatula, a blender, and a pan.
Similarly, bug bounty tools will help you gather information, check for misconfigurations, and even spot vulnerabilities. There are numerous tools available, each serving a distinct purpose, such as extracting information quietly or by interacting with the target.
Why Tools Matter in Hunting
Tools are an essential part of bug bounty because they help turn your knowledge and methodologies into action, effectively showing the results of your tests. They support you through every phase, from information gathering and exploitation to reporting.
Every tool is unique in its own way, and it’s your ability to choose the right tool at the right time. The primary purpose of these tools is to help you perform tasks and automate things that would otherwise take hours to do manually. You can actually scan large domains, enumerate subdomains, and gather information from different sources at once using these automated tools.
Most importantly, tools improve both speed and accuracy. In bug bounty, speed is everything. Show up late, and your bug might be marked as a duplicate. The only way to stay ahead is with a strong toolkit.
Where Tools Fit in the Workflow
We observed that bug bounty activities follow a workflow from gathering information to reporting bugs, involving various tools at each stage. Some tools help discover subdomains, others scan for exposed ports or directories, and third ones validate vulnerabilities. Using the right tool at the right time ensures your workflow is efficient and less likely to miss critical information, giving you an edge over other bug hunters.
Recommended Reading
Bug Bounty 101: The Best Courses to Get Started in 2025

Reconnaissance – The First Step
Reconnaissance, also known as recon, is the process of collecting information about your target before you begin searching for vulnerabilities. It is the first step in the bug bounty process, and it looks like you are mapping out the target’s digital footprint.
In this process, you will be identifying domains, subdomains, technologies, ports, directories, APIs, and many more. This information is crucial, as it will guide you on where to look for bugs during hunting.
The stronger you recon your target, the higher your chances of finding bugs. Beginners often ignore reconnaissance. People just starting out usually attempt to learn basic attack techniques by watching videos or reading blogs, then jump straight into the target, looking for bugs they’ve just learned about, even without conducting a proper reconnaissance process, which is considered a very bad practice in the security industry. Sometimes, you might be lucky and discover bugs during recon that are worth money. If you rush or skip this step, you might miss opportunities that someone else will find.
It’s all about preparing yourself to find actual bugs on your target. Recon helps you by mapping the attack surface. When you start the recon process, you’ll see how the pieces of the target connect—like which domain links to which services, the technologies in use, and potential weak spots. After mapping the attack surface, you’ll know where to focus your bug hunting instead of testing randomly. Targets with a broad scope require thorough reconnaissance, which can uncover forgotten subdomains, outdated technology stacks, or even hidden directories not linked publicly.
Recon can be divided into two categories: passive and active.
What is Passive Recon
Passive reconnaissance involves collecting information about your target without direct interaction. In simple terms, you don’t need to send any inputs or packets to the target’s server to gather data. Instead, you can use publicly available sources like third-party databases or existing records. This technique allows you to find details such as technologies used, exposed files, or even SSL certificates.
The main goal of performing passive reconnaissance is to remain stealthy and quietly gather a general understanding of the target, since it is safer and less likely to be detected.
How active recon differs
If passive reconnaissance is all about staying stealthy and gathering information quietly, active reconnaissance is the complete opposite of it. Active reconnaissance is the process of extracting detailed information about the target by interacting with it. In bug bounty programs, active reconnaissance involves scanning ports, probing services, and crawling websites. Unlike passive recon, this method does not keep your identity anonymous. You will be exposed and leave digital footprints.
You should start with active reconnaissance only after thoroughly completing passive reconnaissance. While active and passive recon can be distinguished, they cannot replace each other. Once you’ve gathered enough information from public sources, proceed to active recon. You can verify passive findings with an active scan, such as checking if ports are open.
Top 5 Passive Recon Tools
Here is the list of the TOP-5 tools for passive recon I recommend you start with.
1. Netlas.io
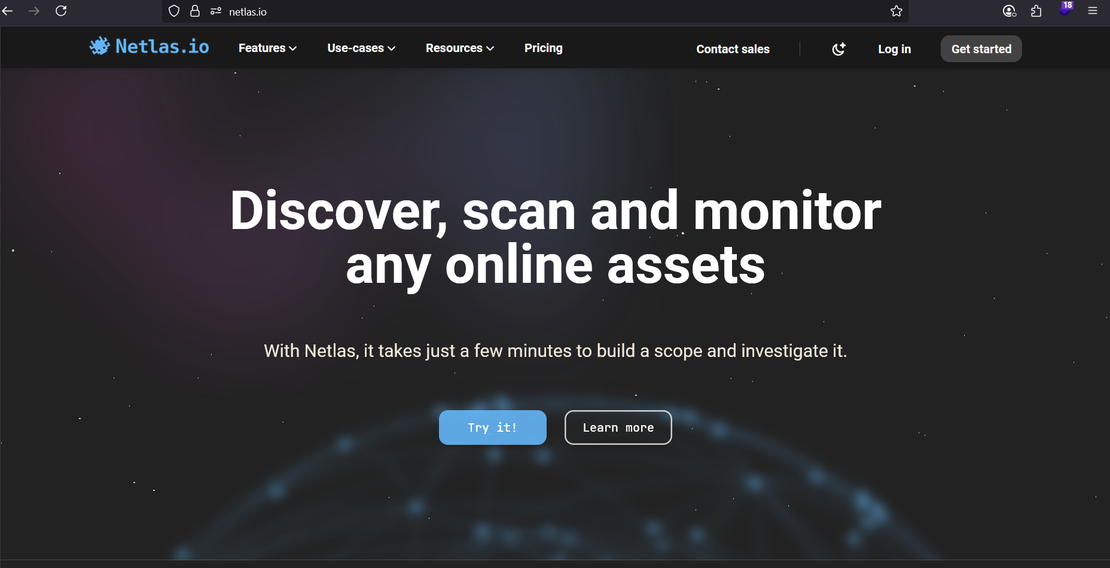
Netlas.io is one of those tools that, once you try it, you’ll find yourself depending on it for passive reconnaissance. It’s very similar to a search engine but used to map the internet’s infrastructure. Netlas.io gives you everything you need for passive recon in one place, making the whole process a lot easier and faster. Using Netlas, you can discover almost everything: domains and subdomains, IP ranges, open ports and services, WHOIS and DNS records, etc.
Netlas works with a variety of tools to fit your workflow. Use the Maltego module for data visualization, Chrome/Firefox extensions for quick checkups, or integrate with Subfinder, theHarvester, TLDFinder, and other tools. You can also access Netlas via API, CLI, or SDK for custom automation.
Explore the full list at Netlas.io →
Setting Up Netlas.io
Setting up Netlas is not complicated; the process is easy and straightforward. Once registered, you can access the Netlas web app to run searches and explore IPs, DNS records, subdomains, and more.
If you’re really passionate about automation, then I suggest you to grab the API key from your profile page and integrate it into scripts or other tools which will help you save time searching manually. Netlas caps you at 50 searches per day and 2,500 search results per month, with API requests limited to 60 requests per minute. For most beginners, these limits are sufficient, but you can upgrade if you’re working on larger reconnaissance projects.
Request Your Free 14-Day Trial
Submit a request to try Netlas free for 14 days with full access to all features.
2. Waybackurls

Waybackurls is a powerful tool that helps you extract all URLs a domain has ever had recorded in the Wayback Machine (archive.org). In simple terms, it allows you to uncover a site’s history, including old pages, login panels, or APIs that may still be accessible online. Some of the findings you might encounter include:
/old-login.php/beta/api/v1//test/admin/
Using Waybackurls you can find endpoints, tokens and secrets, and also hidden directories. You can always integrate waybackurls findings with many other tools like Nmap, Gobuster, Sublist3r, and many more for effective recon strategies.
Setting Up Waybackurls
As Waybackurls is a tool based on Go language, you will first need to install Go on your machine.
Installing Go :
sudo apt install golangInstall Waybackurls :
go install github.com/tomnomnom/waybackurls@latestRun Waybackurls :
echo "target.com" | waybackurls
3. Censys
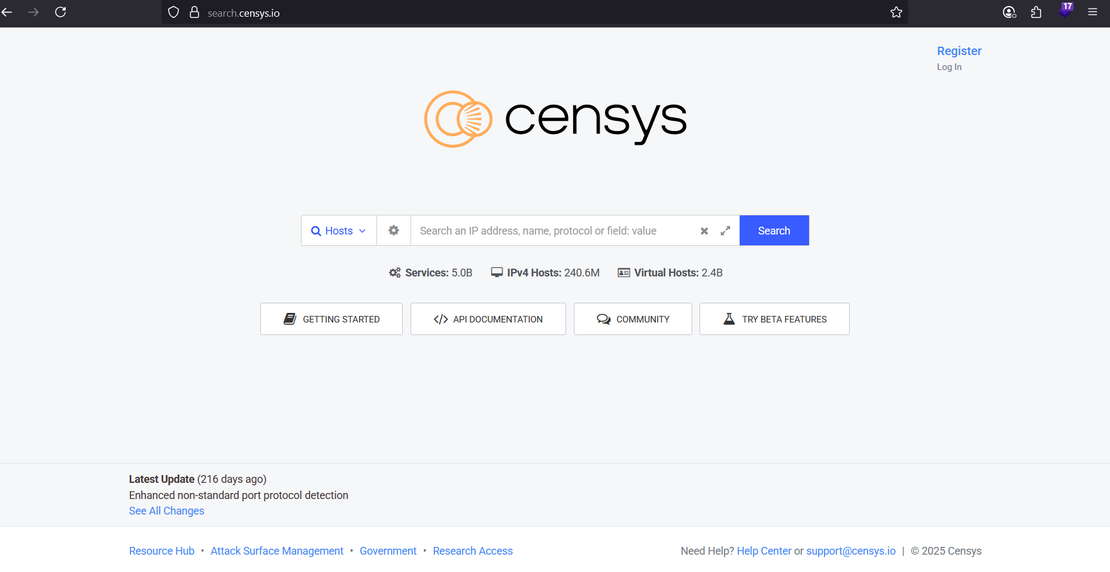
Censys is another tool used for passive reconnaissance and is also a popular attack surface management (ASM) solution. It performs many tasks typical of passive recon tools, such as finding IPs, detecting open ports, grabbing banners, and gathering DNS and WHOIS information. A unique feature of Censys is its ability to generate certificate details and pivot from a certificate to uncover related connections.
There aren’t many drawbacks to Censys, but beginners may find it challenging to use due to its unique search language or syntax. Unlike Google, where you can simply type your query and get results, Censys requires specific search commands. For instance, to find HTTP servers in the US, you need to enter something like:
services.service_name:"HTTP" AND location.country:"United States"You might feel like you’re learning a new language just to run a search, but once you get used to it, it’s not that difficult. You can also integrate their APIs into your scripts to automate tasks more quickly.
Setting Up Censys
Just sign up on the Censys Search site to get started. Log in to access a dashboard for running queries. The free Community plan lets you make 250 search queries each month and view results in the interface. API access now requires a paid subscription.
Recommended Reading
Netlas vs Censys: Platforms Comparison

4. crt.sh
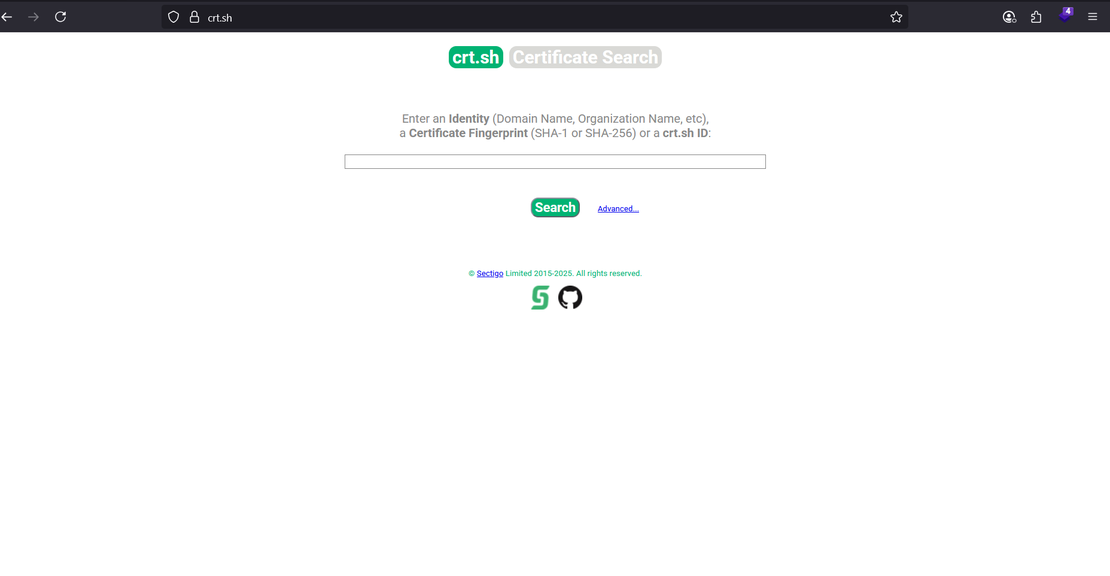
crt.sh is a service focused exclusively on certificates. Unlike Censys, it does not allow you to search for open ports, banners, or WHOIS records. Instead, you can enter a domain name, and crt.sh will show you a list of all SSL/TLS certificates ever issued for that domain.
By running a simple query on your target domain, you can uncover many subdomains that are not listed elsewhere. For example, imagine a startup sets up a new HR portal at hr.example.com intended only for internal testing. Since the portal is under development and not publicly linked, search engines won’t find it. However, as soon as an SSL certificate is generated for hr.example.com, crt.sh logs it publicly. This visibility allows hackers to discover and potentially exploit subdomains even before they are officially launched.
Setting up crt.sh
The best part of this tool is there isn’t any setup. It is completely free and has no rate limit to worry about. I strongly recommend adding crt.sh to your recon toolkit.
5. Hunter.io
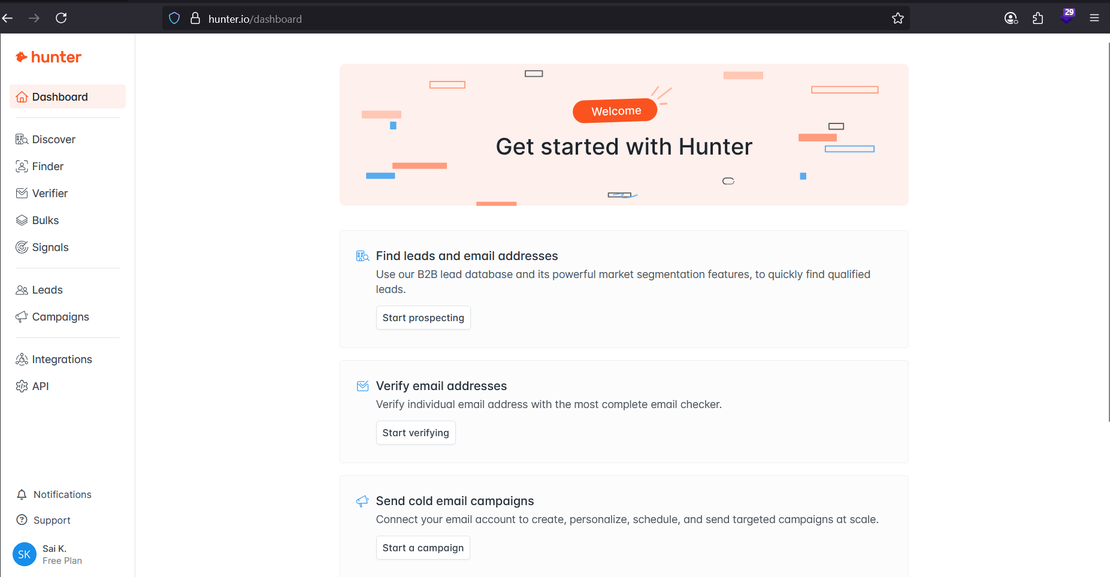
Hunter.io is a tool designed to discover email addresses associated with target domains. Its email finder feature allows you to locate the email address of a specific person within a company. Hunter.io can also assist in phishing surface mapping; by identifying publicly exposed email addresses, you can determine potential phishing targets. This process is entirely passive, as the tool gathers information from public sources. Additionally, Hunter.io offers an Email Verification feature to check if an address is valid and active. A Chrome extension is also available, enabling you to find email addresses while browsing target sites. However, you may not always find the exact person or obtain a sufficient number of email addresses.
Although hunter.io is not typically considered a core bug bounty tool, it can assist in various ways, such as uncovering who operates certain services and providing social engineering opportunities. The email addresses it reveals may also help you infer internal usernames.
Setting up Hunter.io
As we’ve seen, most passive reconnaissance tools are easy to set up. To get started with Hunter.io, sign up for a free account on their official website. The free plan allows you to perform 25 searches and 50 email verifications per month, which is ideal for beginners. I don’t recommend upgrading to the paid version, as Hunter.io is typically just a supplementary tool for most users.
Top 5 Active Recon Tools
1. Nmap
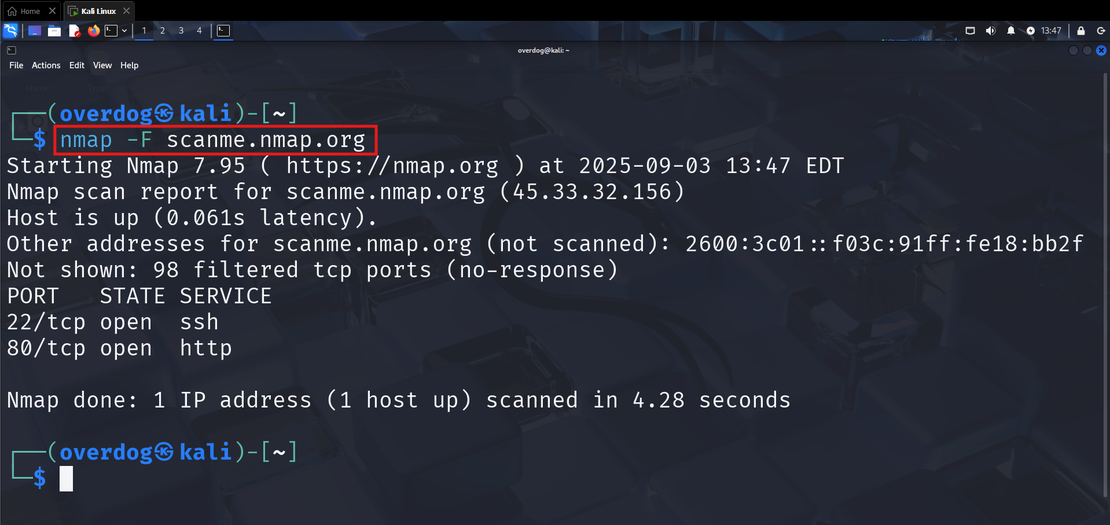
Starting with active reconnaissance, Nmap is always at the top and one of my favorites.
My first scan is always Nmap when I am approaching any target. Nmap helps you discover open ports on the target. It can also fingerprint operating systems, detect running services, and run custom scripts through NSE to identify if a particular port is vulnerable or not.
You can find details on installing Nmap, what NSE is, and how to detect vulnerabilities with Nmap in the dedicated article.
Recommended Reading
How to Detect CVEs Using Nmap Vulnerability Scan Scripts

2. Masscan
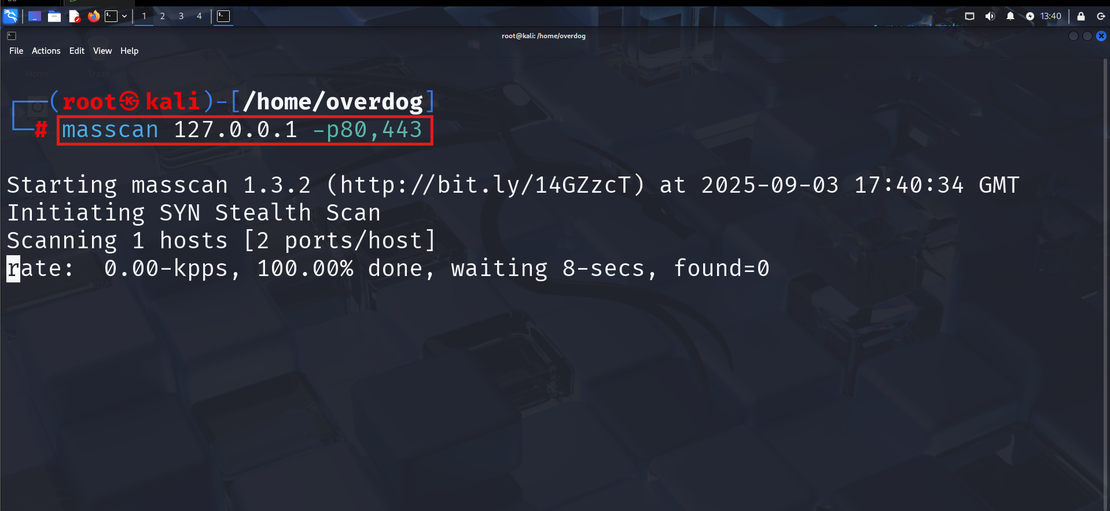
Masscan is a high-performance port scanner. It is known for its speed and efficiency and is capable of scanning the entire IPv4 Internet in a few minutes, but only if your internet bandwidth supports it. This is not another traditional service detection or banner-grabbing tool; it’s something more than that.
Masscan is really helpful when you are looking at a huge range of IPs and want to discover all the open ports; the same task on Nmap can be time-consuming and puts a lot of load on your system. Nmap is, of course, helpful once you pass your Masscan results to it for deeper analysis.
Setting up Masscan
Installing Masscan :
sudo apt install masscanRunning a simple scan :
sudo masscan -p 80,443 192.168.1.0/24 --rate=1000We know that port 80, 443 represents HTTP and HTTPs. This command let’s you check these open port on a local subnet at rate of 1000 packets per second.
Want to scan all the ports on a single host?
sudo masscan 192.168.1.10 -p1- 65535 --rate=10000This command quickly scans every post existing on your host
192.168.1.10.
3. Sublist3r
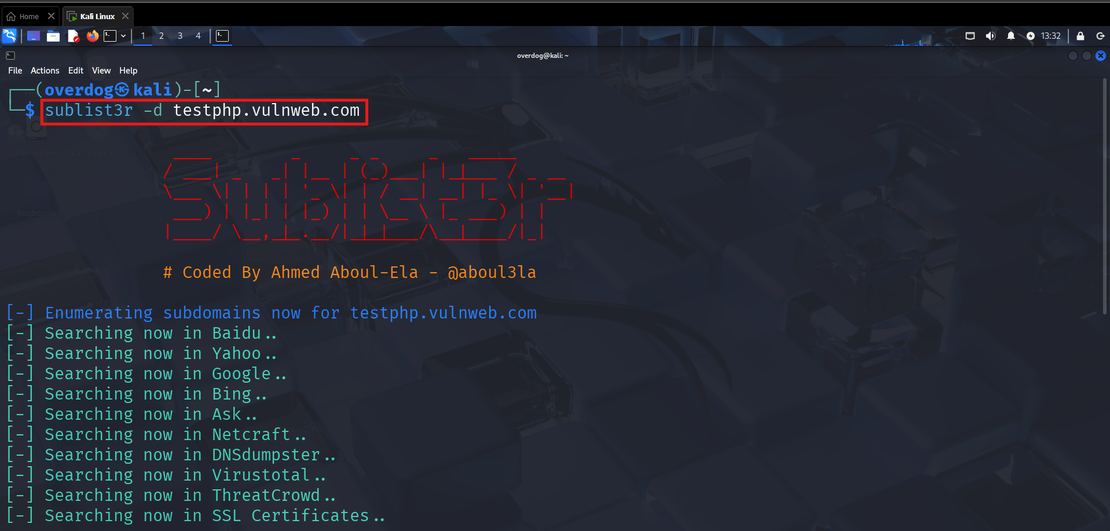
Sublist3r is a tool designed to find the subdomains of your target. We’ve seen in the above sections that passive tools, like Netlas and Censys also provides this feature, but this tool will help you find subdomains using multiple public sources. It works by scraping search engines and public APIs, also uses certificate data to collect subdomains. Once you are done collecting these subdomains, you can run Nmap on these subdomains to check for open ports and other tools. You can also test for subdomain takeovers based on the status code.
Setting up Sublist3r
Installing Pre-requisites :
sudo apt install python3 python3-pip pip3 install requests argparseYou will need Python3 along with the requests and argparse libraries to run this tool.
Clone Sublist3r :
git clone https://github.com/aboul3la/Sublist3r.git cd Sublist3rRun a scan :
python3 sublist3r.py -d target.comThis command will enumerate all the subdomains of your target available across multiple sources.
You can integrate Sublist3r with another tool called HTTPx for better results. Once you have the list of domains, you can run HTTPx to check which ones are actually live and responding. Basically, it helps you validate live hosts and reports the status code for the subdomains.
Example:
cat subdomains.txt | httpx -silent -status-code -title -v4. Gobuster
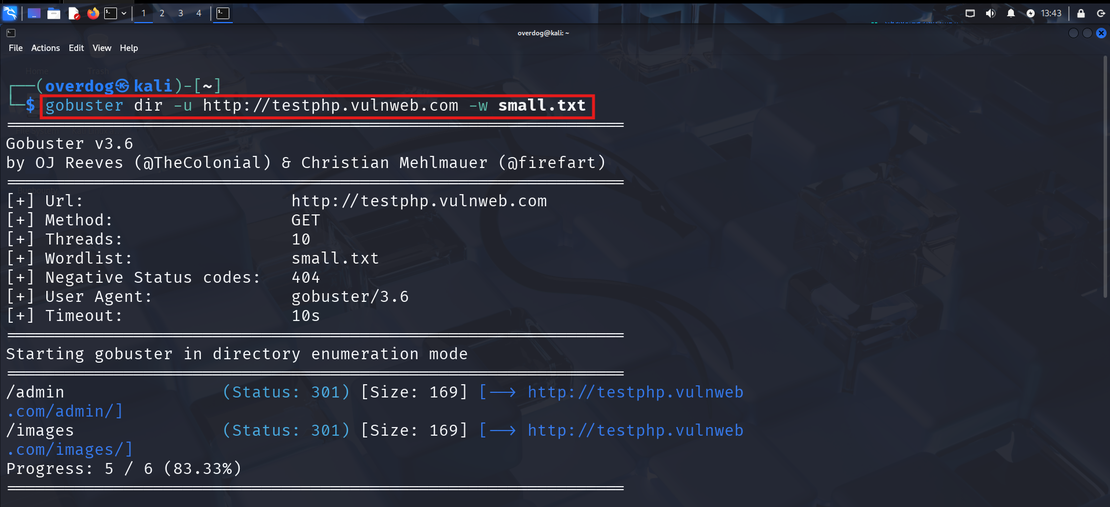
Gobuster is again one of my favorite tools; this tool is designed to discover directories and files on your target. Unlike passive recon tools, this tool will actively interact your with the target by sending an HTTP request. Gobuster is used to brute-force URLs using wordlists, which will help you find hidden admin panels, hidden directories, and endpoints.
Combining this tool with Sublist3r is the best way to use this tool, as it makes sure you are not missing out on anything in your target’s web structure. This tool will not only help you find hidden vulnerabilities sometimes that data you discover can directly lead to discovering a vulnerability.
Setting up Gobuster
Installing Gobuster
sudo apt install gobusterBasic Usage
gobuster dir -u https://target.com -w /usr/share/wordlists/dirb/common.txtThis command performs a directory brute forcing on the target website using the word list called common.txt. Here, -u specifies the target and -w points towards the wordlist.
gobuster dns -d target.com -w /usr/share/wordlists/subdomains.txtThis command is very similar to the above one, but -w specifies the wordlist being used contains the subdomains, which scan for the subdomains instead of directories.
You can install some popular wordlists from here: SecLists, Rockyou.txt, FuzzDB. You can also combine Gobuster results with HTTPx to check which endpoints are actually active before proceeding with further testing.
Recommended Reading
Nmap Cheat Sheet: Top 10 Scan Techiques

5. Nikto
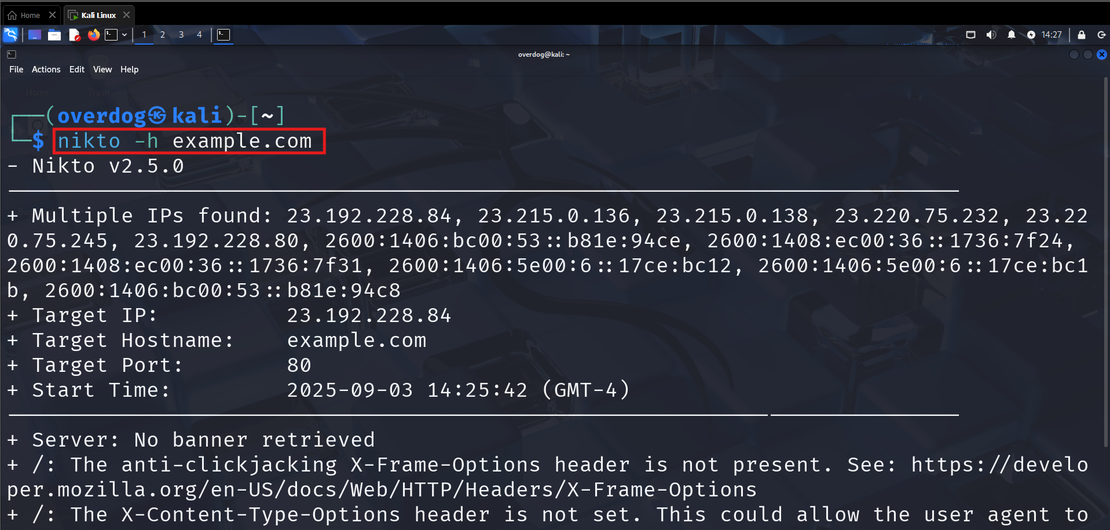
Nikto is a classic active reconnaissance tool used to identify misconfigurations, outdated software, and known vulnerabilities on target servers. This command-line tool features a large built-in database of server checks, listing thousands of server versions and common vulnerabilities. As a result, you can quickly run scans and receive prompt feedback about any outdated software.
Bug bounty hunters frequently use Nikto because it’s free, easy to use, and effective at finding easily exploitable bugs. One of its best features is support for multiple output formats, including plain text, XML, HTML, NBE, and CSV.
Setting up Nikto
Installing Nikto
sudo apt install niktoScan a target
nikto -h https://target.comScan on a custom port
nikto -h https://target.com:8080Output the results to a file:
nikto -h https://target.com -o results.txt
Nikto can actually be combined with Gobuster to scan and discover vulnerable endpoints. Nikto generally does an aggressive scan, so using it a many times can generate lots of requests and may trigger alerts in the target servers.
Planning Your Recon
Now that we’ve already reviewed most of the important tools used for reconnaissance, we understand that we can’t actually differentiate or replace passive with active or vice-versa as both of them have different purpose. Let’s summarize them for an easier and better understanding of the overall tools.
| Passive | Active | |
|---|---|---|
| Purpose | Collect info without touching the target directly | Interact with the target to map ports, endpoints, and potential vulnerabilities |
| Tools | • Netlas.io • Wayback Machine • Censys • Crt.sh • Hunter.io | • Nmap • Masscan • Sublist3r • Gobuster • Nikto |
At this point, planning your recon workflow becomes straightforward. Hunters typically start with passive tools, then transition to active tools to verify, probe, and map the target. This approach can save time and increase the chances of finding bugs.
Let’s review some best practices to help you perform effective reconnaissance and identify potential vulnerabilities.
Start with passive, then go active
Doesn’t matter how excited you are to discover things; never skip passive recon, as it will break your workflow and methodologies. Once you skip it and start hunting, you’ll find it difficult to get back and gather the information from scratch.Organize your findings
Keeping your passive findings separate from active ones will help you keep things simple and save a lot of time by avoiding confusion. It makes the workflow easier when you’re looking for findings during exploitation.Use multiple tools
Never stick to a single tool. As suggested in each tool, you can always combine a tool with another to generate efficient search results. You can also use two tools with similar functionality on your target; in case something is missing in one tool, you can find it in the other one.Update your wordlist
Wordlists often get outdated, and your brute-force might result in zero outputs. Updating your wordlists or creating your own custom wordlists using crunch or cupp might be really helpful.Document everything
Beginners often forget to document each and every finding; this will only lead to confusion. I’ve personally experienced this, and forgetting to document your findings will only waste your time. Note down dates, tools, commands, results, and whatever you come across.
Case Study: Mapping Porsche
Let’s walk through a short example on how a bug bounty hunter might use the tools we’ve covered. For demonstration, we’ll use a publicly listed target from HackerOne
Step 0: Understand the Program Scope
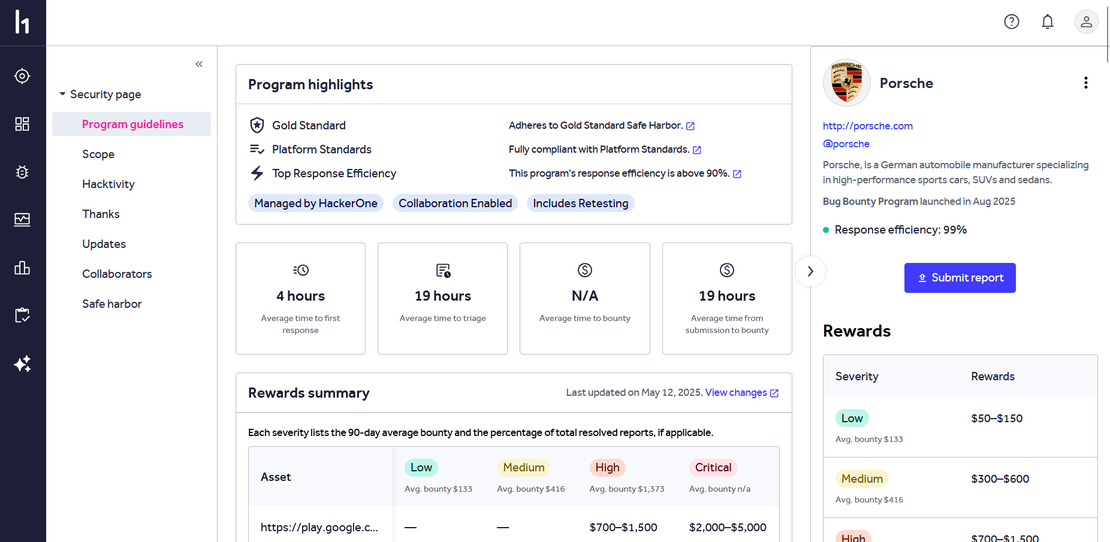
Before touching any tool, the first step in bug bounty is to understand the program guidelines and analyze the scope of the target. For our example, we’re using the Porsche HackerOne Program
Taking the time to read the program carefully can help you prevent potential violations and also saves your time by avoiding to search on the scopes that are not listed. It also helps you plan your recon effectively, focusing only on what’s allowed.
Step 1: Using Netlas.io on Porsche
Discovering domains and Subdomains:
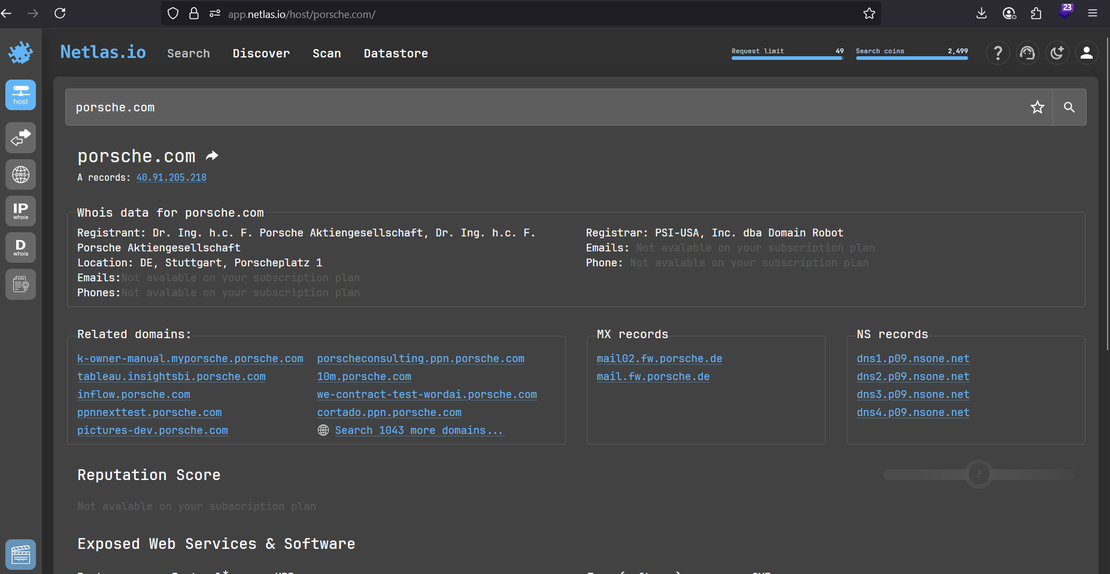
- Searching for “porsche.com” in Netlas.io’s search bar will give you a complete overview of the domain, including WHOIS information, mail records, and a set of related Porsche subdomains.
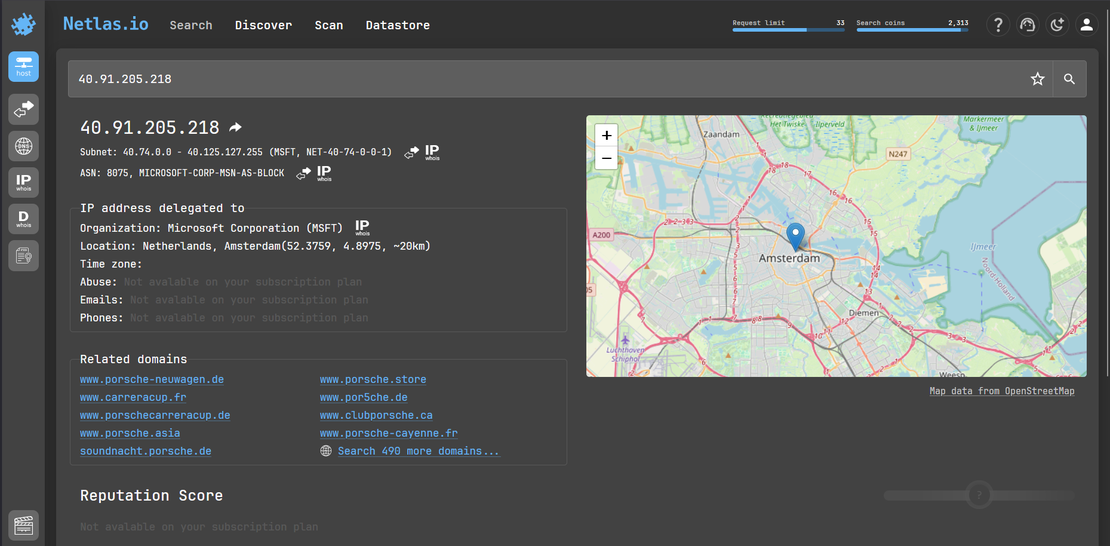
- Clicking on Porsche’s IP addresses gives you detailed information about its network range, geographic location, and connected domains. This will show you which subnet the IP belongs to, helps you to discover other potential domains in the same range. This will show you which subnet the IP belongs to and help you discover other potential domains in the same range.
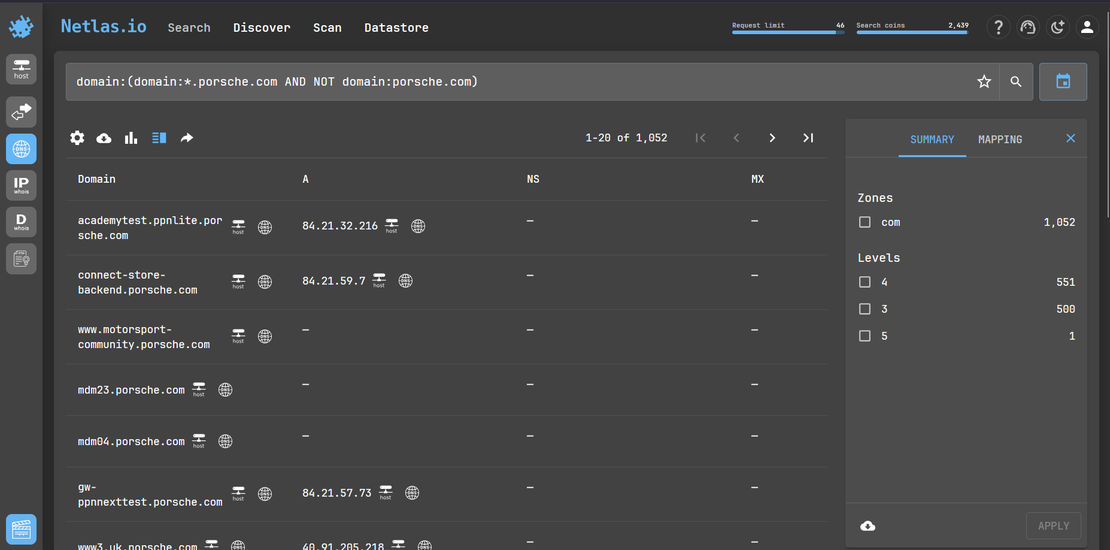
- Next, using the Netlas’s advanced search query feature you can enumerate all subdomains under Porsche.com.
domain:(domain:*porsche.com AND NOT domain:porsche.com)- This enumerates over a thousand individual subdomains, each with its own details and IP address.
Step 2: Using Censys on Porsche
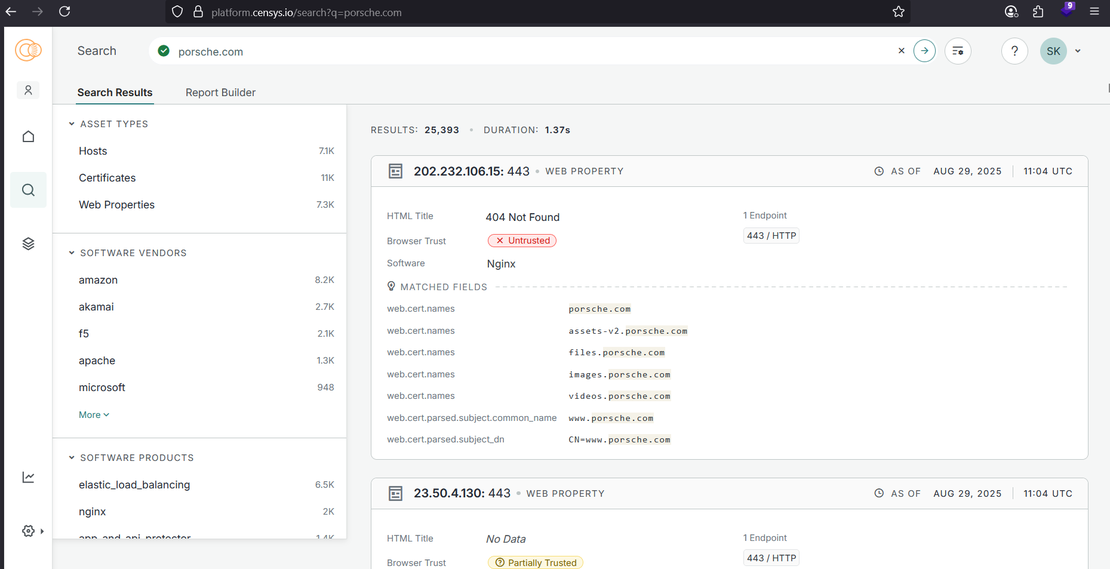
- Searching for “porsche.com” in the Hosts section on Censys, gives subdomains, server details, and certificate names
Next, click on certificates on the left panel:

- Each entry shows the domain, issuer, validity period, and all associated subdomains its a useful way to uncover hidden assets. You can click on the tags like trusted, untrusted, expired to view all the related certificates with particular tag.
To view hosts in a specific country, let’s say Germany, you can run this search query:
dns.names:"porsche.com" AND autonomous_system.country_code:"DE"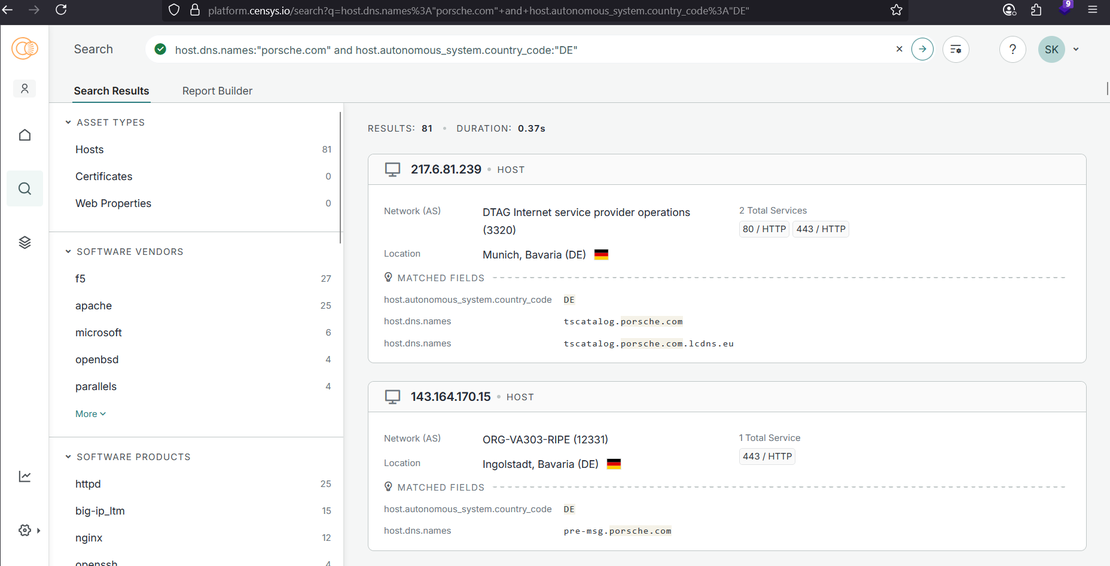
- This will filter Porsche hosts that are located in Germany. Useful to see assets in Porsche’s home country.
You can also view hosts running SSH (possible admin entry points) using this query:
host.dns.names:"porsche.com" and host.services.protocol:"SSH"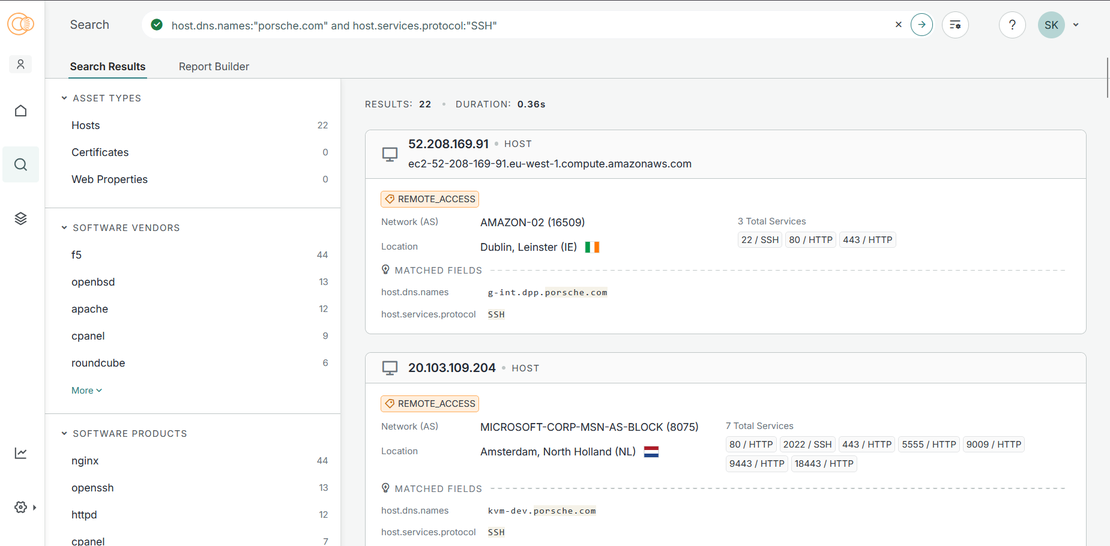
Shows you servers under Porsche.com that expose SSH. These are typically internal/admin services but sometimes found exposed.
Let’s dig into the history of Porsche and see if we can find something using Waybackurls
Step 3 : Using Waybackurls on Porsche
Digging into historical URLs with Waybackurls
- Collect archived URLs for a domain
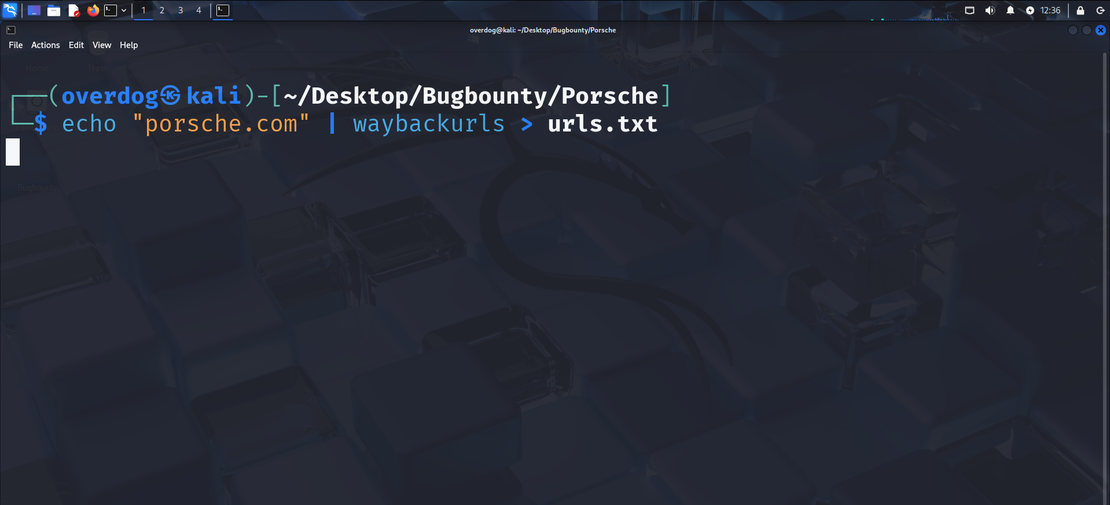
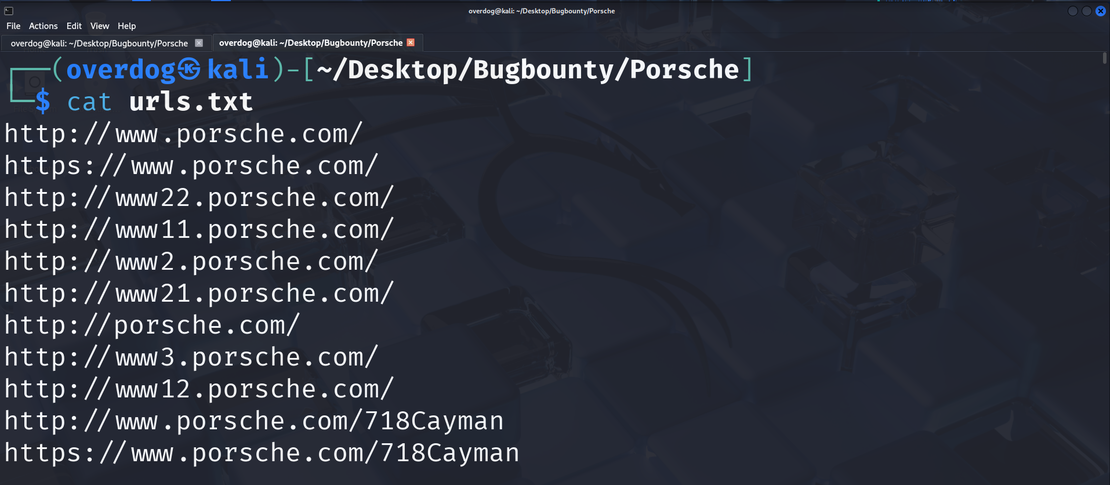
echo "porsche.com" | waybackurls > urls.txtThis will dump every single URL of Porsche that are archived in the Wayback Machine. This will usually take time to execute but, you can get thousands of endpoints.
- Integrating Waybackurls with HTTPx
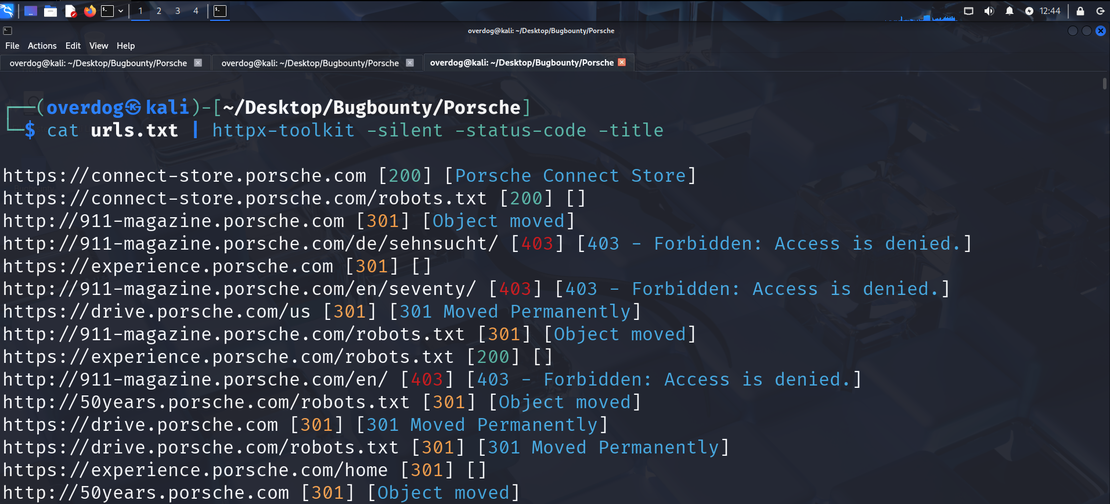
cat urls.txt | httpx-toolkit -silent -status-code -titleThis command will filter out deadlinka and outputs only the live and active links along with their HTTPS status code.
Step 4 : Searching for Open Ports and Directories
Let’s now search for subdomains linked to Porsche using Sublist3r and open ports using Nmap.
Enumerate Subdomains with Sublist3r
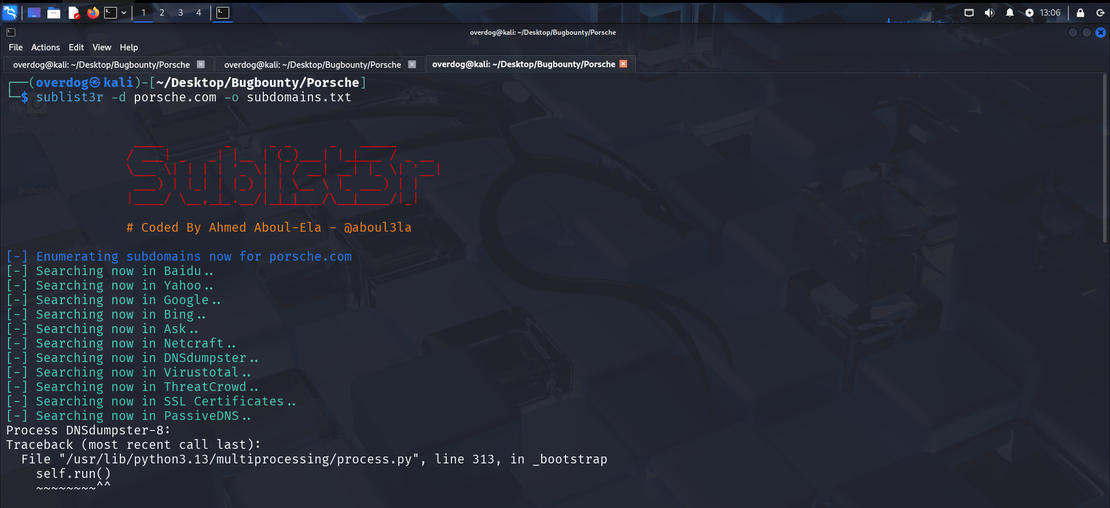
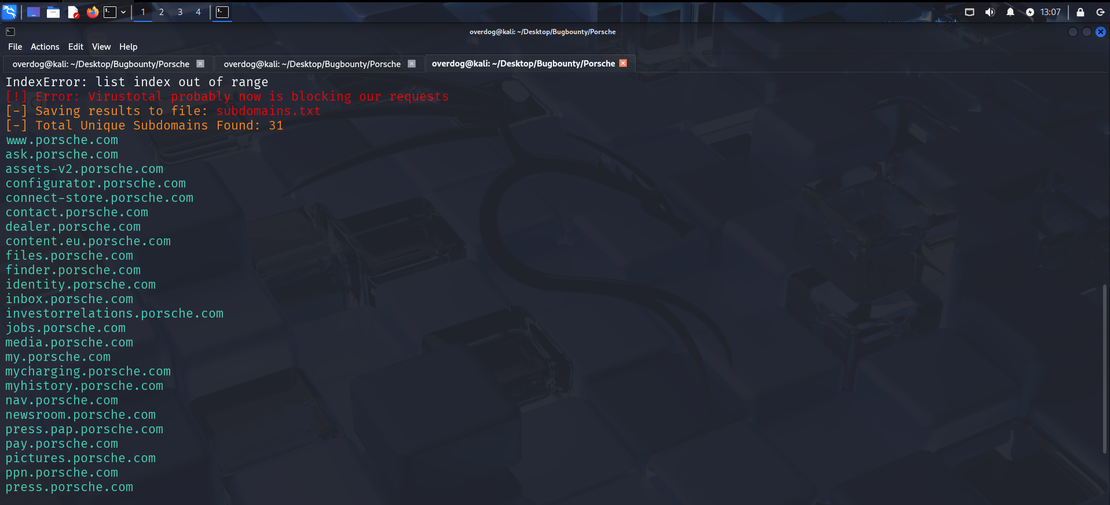
sublist3r -d porsche.com -o subdomains.txtThis command will query multiple sources to find subdomains, actively interacting with Porsche to fetch subdomains.
Scan Ports with Nmap
Let’s use the subdomains.txt file that we just created using Sublist3r to search for open ports using Nmap:
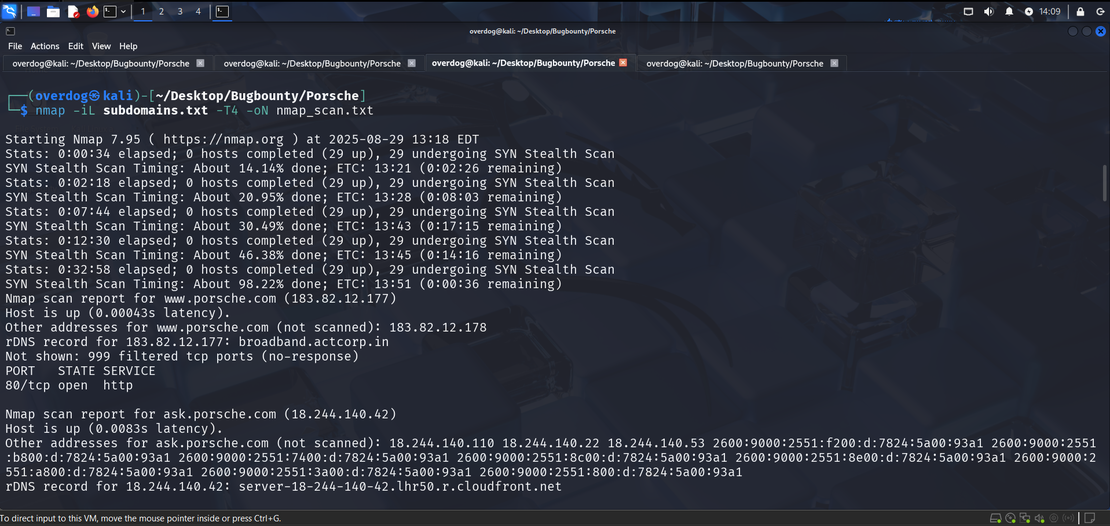
Scanning the subdomains using command :
nmap -iL subdomains.txt -T4 -oN nmap_scan.txt-iL stands for input lists, -T4 scans the target aggresively.
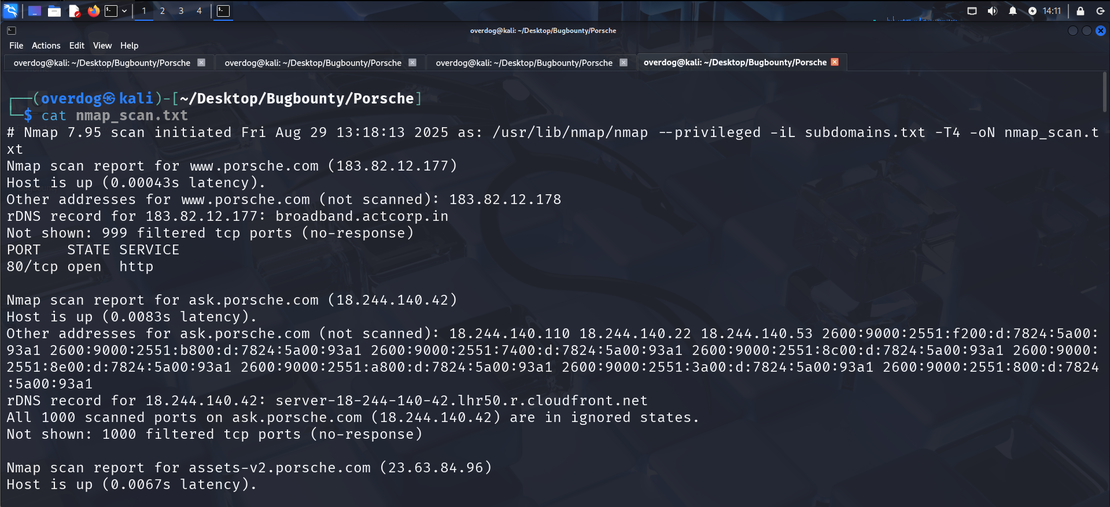
View the scan results using this :
cat nmap_scan.txtYou can see all the open ports on every subdomain that is linked to Porsche.com
Script your workflow
We’ve reviewed some of the most common tools, and you might feel like you have a tool for almost every task and you can automate the entire recon process. But that’s not true. Sometimes the existing tools are just not enough, or they don’t support your workflow. That’s how scripting your own tools will help you fill that gap.
Writing your own tool will help you automate repetitive tasks, collect and filter data, chain multiple tools, and much more. You can start scripting with languages like Python, Bash, Go etc. Scripting your own tool doesn’t mean you need to invent something like Nmap or Gobuster. Tools like Sublist3r, Waybackurls, Nmap, or Gobuster are already well tested and constantly updated by large communities. Custom tools work best when you’re stuck in the workflow.
Here’s a comparison of existing tools and custom-built tools :
| Aspect | Use Existing Tools | Build Your Own |
|---|---|---|
| Speed | Fast to set up and run | Slower, need to code and debug |
| Reliability | Well tested, community maintained | May be buggy until refined |
| Learning | Minimal (just learn usage) | Deep understanding of protocols, recon logic |
| Flexibility | Limited to what the tool offers | Full control over features and workflow |
| Effort | Almost none beyond usage | Requires time and coding skills |
Wrapping It All Together
Recon is only the first step of bug bounty. Being able to find subdomains, endpoints, open ports or hidden directories is cool, but it doesn’t make a difference if you are not exploiting it. Exploitation is the next step after recon; every single detail you collected from your target can be used to exploit the target.
Example : An old login page like /old-login.php found through Waybackurls might let you test weak authentication or a subdomain you found using Sublist3r and HTTPx with the status code 404 can lead to subdomain takeover.
Recon only helps you map your target; always validate your findings to determine if it can be turned into a real security issue.
Being good at bug bounty isn’t just about hunting vulnerabilities; it’s about really understanding your tools, your target, and the workflow. Mastering recon, using the right tools, and keeping everything up to date can actually increase your chances of finding bugs.

I can show you how deep the Internet really goes
Discover exposed assets, infrastructure links, and threat surfaces across the global Internet.
Related Posts

August 13, 2025
Bug Bounty 101: The Best Courses to Get Started in 2025

June 19, 2025
Nmap Cheat Sheet: Top 10 Scan Techiques

July 23, 2025
SOCMINT: Intelligence in the Social Media Era

June 25, 2025
theHarvester: a Classic Open Source Intelligence Tool

July 13, 2024
Best Attack Surface Visualization Tools

June 8, 2025
ASN Lookup Explained: Tools, Methods & Insights