Using TLDFinder with Netlas
December 23, 2024
6 min read
Developed by Project Discovery, TLDFinder is a potent tool that lets users find top-level domains (TLDs) and related subdomains. This guide provides a step-by-step tutorial on setting up TLDFinder on Ubuntu, configuring it with Netlas, and effectively using it for domain discovery and attack surface analysis.
Also, you can find the TLDFinder tool in its GitHub repo, and you can read about idea of the tool in this article.
Understanding Top-Level Domains
A top-level domain (TLD) is the final segment of a website address, appearing after the last dot—for example, .com, .org, or .net. It represents the highest level in the domain naming hierarchy.
In cybersecurity, understanding TLDs is crucial for identifying all variations of a domain name. This knowledge is essential for effectively mapping a target’s online presence and uncovering potential security risks.
Step 1: Setting Up Go on Ubuntu
To use TLDFinder, you need to have Go installed on your system first.
Update your system packages:
sudo apt-get updateDownload the latest Go binary: Use wget to download Go version 1.21.3 for Linux.
wget https://go.dev/d1/go1.23.3.linux-amd64.tar.gzExtract the Go binary: Unpack the downloaded tarball.
sudo tar -xvf go1.23.3.linux-amd64.tar.gzMove Go to /usr/local directory:
sudo mv go /usr/localSet up the Go environment variables: Define the Go root and path in your system profile.
export GOROOT=/usr/local/go
export GOPATH=$HOME/go
export PATH=$GOPATH/bin:$GOROOT/bin:$PATHRefresh your profile to apply changes:
source ~/.profileVerify Go installation: Confirm that Go is correctly installed by checking its version.
go versionThe output should resemble this:
root@ubuntu: # go version
go version gol.21.3 linux/amd64
Request Your Free 14-Day Trial
Submit a request to try Netlas free for 14 days with full access to all features.
Step 2: Installing TLDFinder
With Go installed, you can install TLDFinder: using the Go installation command or downloading a pre-compiled binary.
Option 1: Installing TLDFinder via Go Command
Run the following command to install TLDFinder directly through Go:
go install github.com/projectdiscovery/tldfinder/cmd/tldfinder@latestThis command fetches the latest version of TLDFinder from the ProjectDiscovery repository, along with all necessary dependencies.
During installation, you should see the output indicating the downloading of dependencies:
root@ubuntu: # go install github.com/projectdiscovery/tldfinder/cd/tldfinder@latest
go: downloading github.com/projectdiscovery/tldfinder v0.0.1
go: downloading github.com/projectdiscovery/fdmax v0.0.4
go: downloading github.com/projectdiscovery/gologger v1.1.19
go: downloading github.com/hako/durafmt v0.0.0-20210608085754-5c1018a416b
go: downloading github.com/json-iterator/go v1.1.12
go: downloading github.com/pkg/errors v0.9.1
go: downloading github.com/projectdiscovery/dnsx v1.2.1
go: downloading github.com/projectdiscovery/goflags v0.1.63
go: downloading github.com/projectdiscovery/utils v0.2.5
go: downloading github.com/weppos/publicsuffix-go v0.30.1-0.20230422193905-8fecedd899db
go: downloading golang.org/x/exp v0.0.0-20240119083558-1b970713d09a
go: downloading gopkg.in/yaml.v3 v3.0.1
go: downloading github.com/modern-go/concurrent v0.0.0-20180306012644-bacd9c7ef1dd
go: downloading github.com/modern-go/reflect2 v1.0.2
go: downloading github.com/logrusorgru/aurora v2.0.3+incompatible
go: downloading github.com/projectdiscovery/ratelimit v0.0.51
go: downloading github.com/rs/xid v1.5.0
go: downloading github.com/miekg/dns v1.1.56
...
Option 2: Installing TLDFinder via Pre-Compiled Binary
Alternatively, you can install TLDFinder by downloading a pre-compiled binary, especially if you prefer a straightforward setup without compiling from the source.
Download the pre-compiled TLDFinder binary:
wget https://github.com/projectdiscovery/tldfinder/releases/download/v0.0.1/tldfinder_0.0.1_linux_amd64.zipUnzip the downloaded file:
unzip tldfinder_0.0.1_linux_amd64.zipMove the binary to /usr/local/bin:
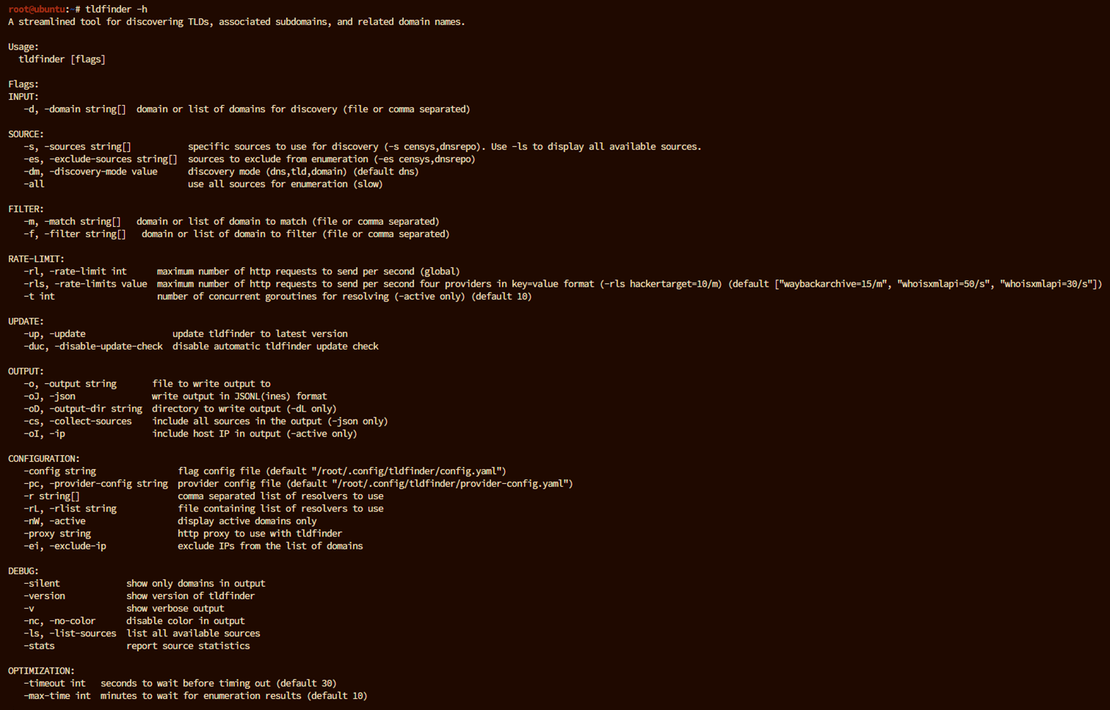
cp tldfinder /usr/local/binAfter installation, you can check TLDFinder’s available commands and options by running:
tldfinder -hThis displays a comprehensive list of commands and flags for TLDFinder.
Step 3: Configuring TLDFinder with Netlas
You need to configure the provider settings to connect TLDFinder with Netlas for additional data sources. This step allows TLDFinder to access your Netlas account and retrieve data on subdomains and IPs.
How to Use Netlas.io API Key in TLDFinder?
First you need to get your API key. It is located in the user profile. Detailed instructions can be found in the documentation.
Open the provider configuration file: Use a text editor to open provider-config.yaml, which stores API keys for various data providers.
nano /root/.config/tldfinder/provider-config.yamlThen, add the Netlas API key: Enter your Netlas API key by finding the area marked netlas in the provider-config.yaml file. Create a Netlas account if you do not now have one, and get an API key from your profile page.
Here’s how the configuration looks:
netlas: [YOUR_NETLAS_API_KEY]Just insert your key here and save the file.
Also at this stage you can connect other tools integrated into TLDfinder. For example, these can be Censys and DNS Repo.
Step 4: Using TLDFinder for TLD Discovery
With TLDFinder configured, you’re ready to perform TLD discovery. TLDFinder supports various modes and flags to customize your search.
Basic TLD Discovery: To search for TLDs that contain a specific keyword (e.g., “google”), run the following command:
tldfinder -d google -dm tldThis command will list all top-level domains associated with “google.” You should see results populate in the terminal as shown:
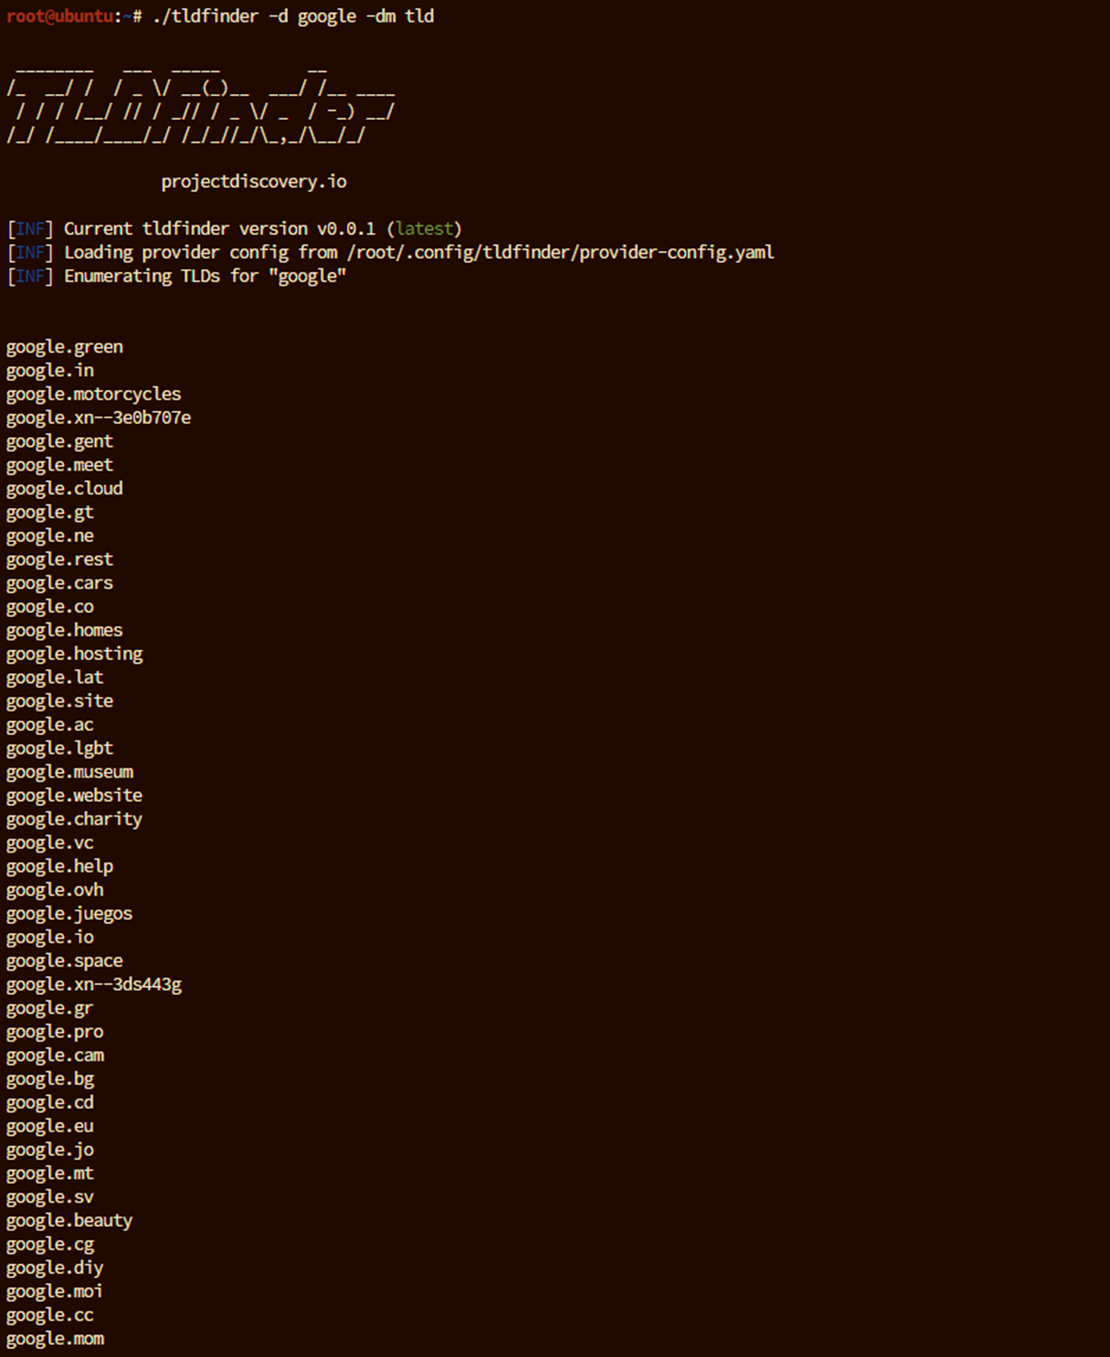
Explanation of Key Flags:
- -d: Specifies the domain or keyword for TLD discovery.
- -dm: Specifies the mode, where tld enables TLD discovery.
Step 5: Discovering Subdomains with Netlas Integration
TLDFinder can also perform subdomain enumeration using the Netlas data source. This enhances TLDFinder’s capabilities by leveraging Netlas’ extensive data for subdomain discovery.
Using TLDFinder with Netlas for Subdomain Enumeration: To search for subdomains associated with “google” using Netlas as the data source, use the following command:
tldfinder -d google -s netlasThis command initiates a subdomain search via the Netlas module, and the results are displayed directly in the terminal.
Example output:
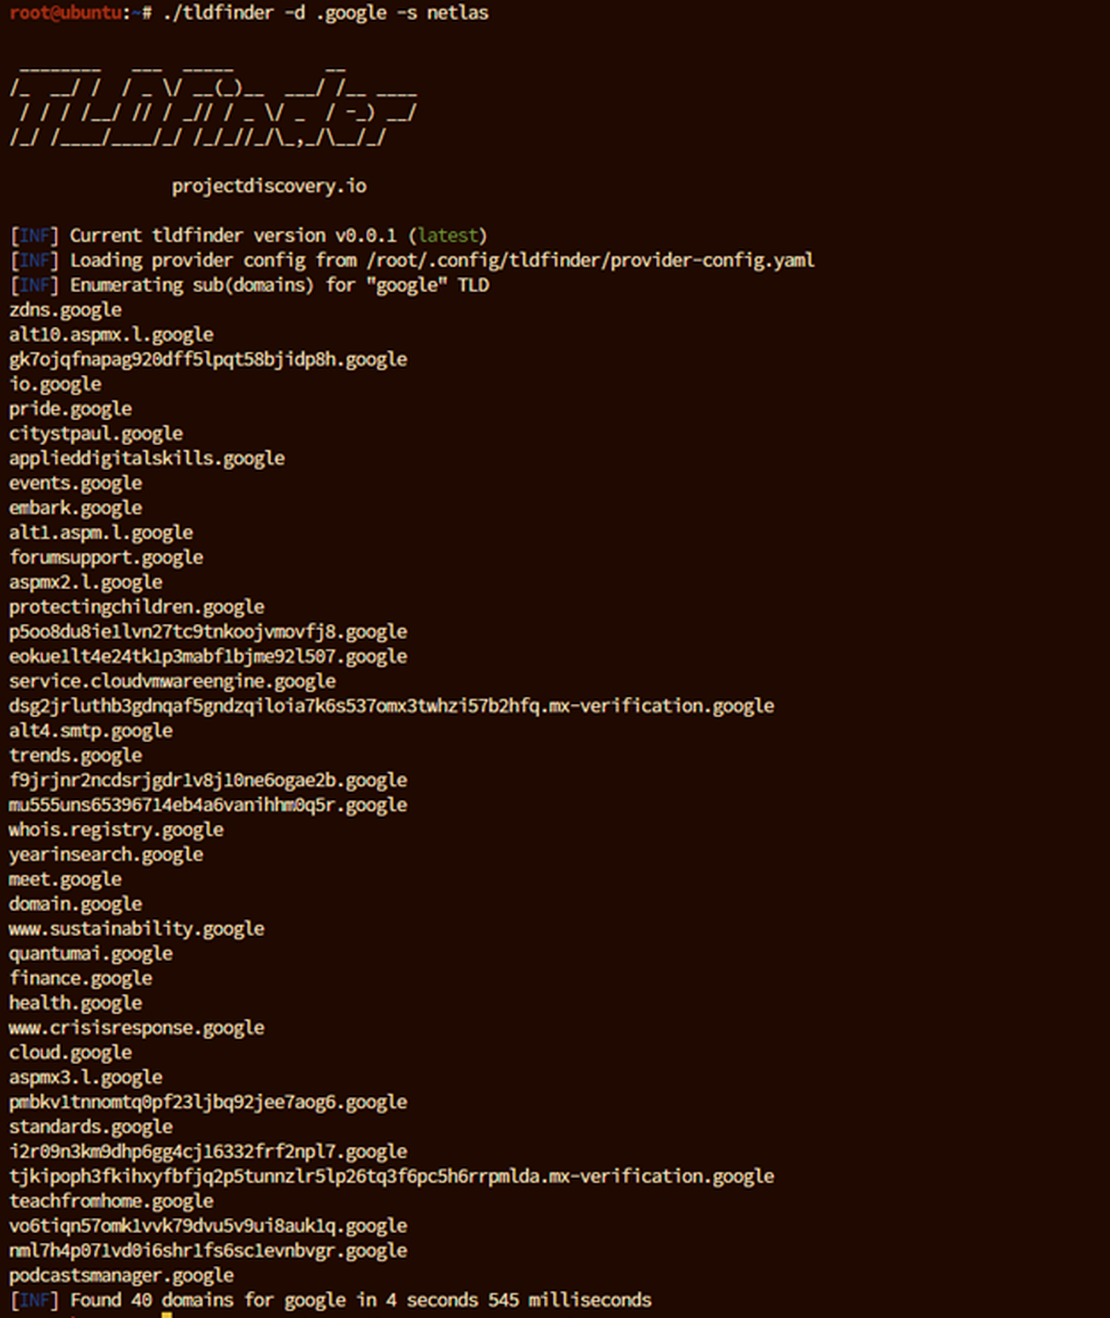
Explanation of Additional Flags:
- -s: Specifies the source for data retrieval, here set to netlas for integration with Netlas.io.
Seeing is Believing
See how Netlas can elevate your threat analysis. Book a quick demo with our team.
How It Works?
Having explored how to use TLDFinder in conjunction with Netlas, it’s also important to examine the internal workings of the integration to understand its limitations and potential applications. To do this, let’s review the source code of the integration. The code we need is in the netlas.go file.
Here we are interested in which API methods are used when receiving data from Netlas. They are present in the following code snippets:
...
go func() {
		defer func(startTime time.Time) {
			s.timeTaken = time.Since(startTime)
			close(results)
		}(time.Now())

		// To get count of domains
		endpoint := "https://app.netlas.io/api/domains_count/"
		params := url.Values{}
		query := fmt.Sprintf("domain:*.%s", query)
		params.Set("q", query)
		countUrl := endpoint + "?" + params.Encode()

		randomApiKey := utils.PickRandom(s.apiKeys, s.Name())
		resp, err := sess.HTTPRequest(ctx, http.MethodGet, countUrl, "", map[string]string{
			"accept":    "application/json",
			"X-API-Key": randomApiKey,
		}, nil, session.BasicAuth{})
...And second part:
...
for i := 0; i < domainsCount.Count; i += 20 {
			offset := strconv.Itoa(i)

			endpoint := "https://app.netlas.io/api/domains/"
			params := url.Values{}
			params.Set("q", query)
			params.Set("source_type", "include")
			params.Set("start", offset)
			params.Set("fields", "*")
			apiUrl := endpoint + "?" + params.Encode()
...At this stage, the interaction between TLDFinder and the Netlas API is already fairly clear. First, the utility queries the number of records in the DNS Search tool using the “domains_count” method. It then gets the resulting number of results. Pagination is also implemented here, with the number of records increasing by 20, corresponding to one page of results in the Netlas search.
This method has certain limitations. When using any Netlas methods except “download,” users will encounter restrictions due to the application’s settings. Specifically, the “download” method returns data in a stream, which can be of any size, while the other methods transmit data in the form of a limited number of pages. As a result, TLDFinder will not be able to return all the results contained in Netlas. However, the number of results will still be substantial—around four thousand—which is more than sufficient for most domains.
Conclusion
Combining TLDFinder with Netlas provides a powerful toolkit for discovering and analyzing TLDs and subdomains. Cybersecurity experts aiming to map out an attack surface, identify potential vulnerabilities, and maintain situational awareness will find this setup especially valuable.
For the most comprehensive results, it’s essential to integrate multiple sources, with Netlas being one of them. Combining data from various tools reduces the risk of missing critical results and ensures a more complete view. TLDFinder supports integration with other tools, which can be achieved in the same way as its integration with Netlas, allowing you to build a more robust and reliable workflow.

I can show you how deep the Internet really goes
Discover exposed assets, infrastructure links, and threat surfaces across the global Internet.
Related Posts

August 30, 2024
Using DNS History in Cybersecurity

July 13, 2024
Best Attack Surface Visualization Tools

September 13, 2024
7 Tools for Web Penetration Testing

December 18, 2024
Netlas vs Fofa: Platforms Comparison

November 21, 2024
Netlas vs Shodan: Platforms Comparison

June 16, 2025
Google Dorking in Cybersecurity: Techniques for OSINT & Pentesting


